How to setup Microsoft Azure as IDP
If trying to set-up use the sample solution described below.
Please understand that even with support contracts iteratec cannot offer support for systems and set-ups other than LUY itself.
Setup Enterprise Application on Microsoft Azure:
To use Microsoft Azure as IDP it is necessary to create a "Enterprise Application" over the Azure portal.
Go to the "Dashboard"
Click on "Enterprise Application"
To add the needed LUY app to your tenant, select New application
Choose the option "Non-gallery application"
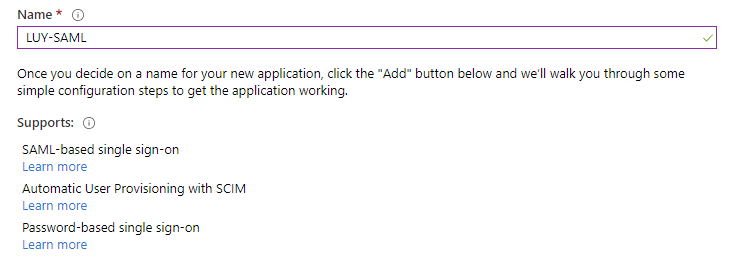
Please enter a name for your "Application" (In our example the "Application" is called "LUY-SAML")
Click on "ADD"
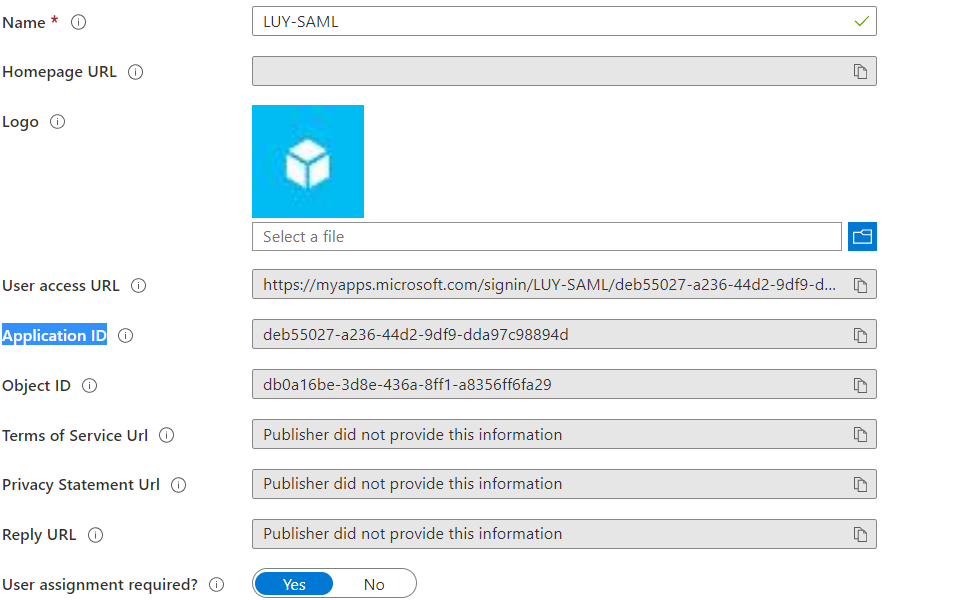
The "Properties" page of the created "Application" opens

The next step is to add all necessary information to the “Enterprise Application”.
Open the page "Manage" - "Properties"
Copy the value from the field "Application ID"
Open the page "Manage" - "Single sign-on"
Click on "SAML"

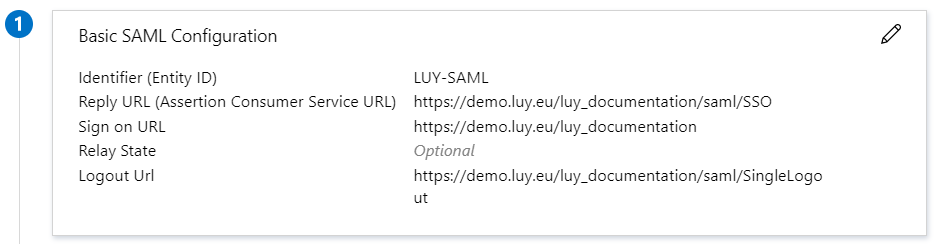
Edit the Basic SAML Configuration:
Enter a title for the "Identifier (Entity ID)"
(The name for our example is "LUY-SAML")The "Reply URL (Assertion Consumer Service URL)" is the URL of LUY with the addition "/saml/SSO"
(The "Reply URL" for our example is "https://demo.luy.eu/luy_documentation/saml/SSO")The "Sign on URL" is the URL of LUY without the "/" on the end(The "Sign on URL" for our example is "https://demo.luy.eu/luy_documentation")
The "Relay State" is optional and stays empty
The "Logout Url" is the URL of Luy with the addition "/saml/SingleLogout"(The "URL" for our example is "https://demo.luy.eu/luy_documentation/saml/SingleLogout")Then the "Basic SAML Configuration" looks like that:
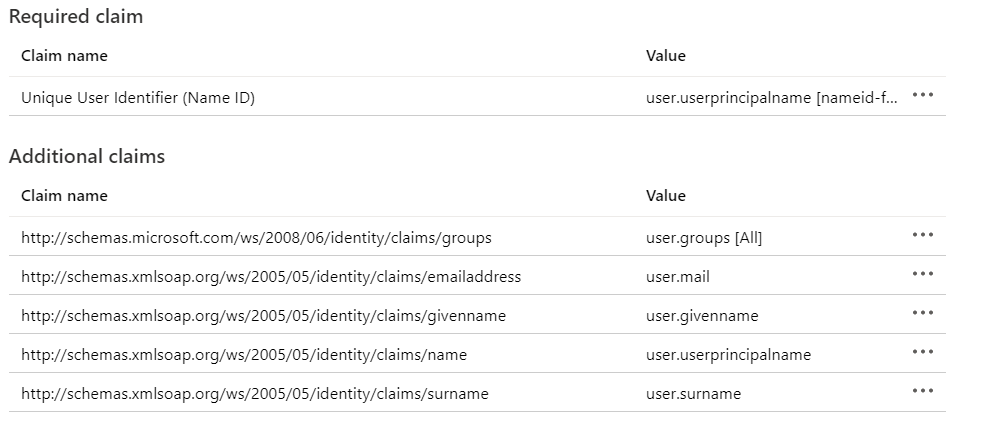
Edit the User Attributes & Claims:
After the page is loaded the default setup looks like this:
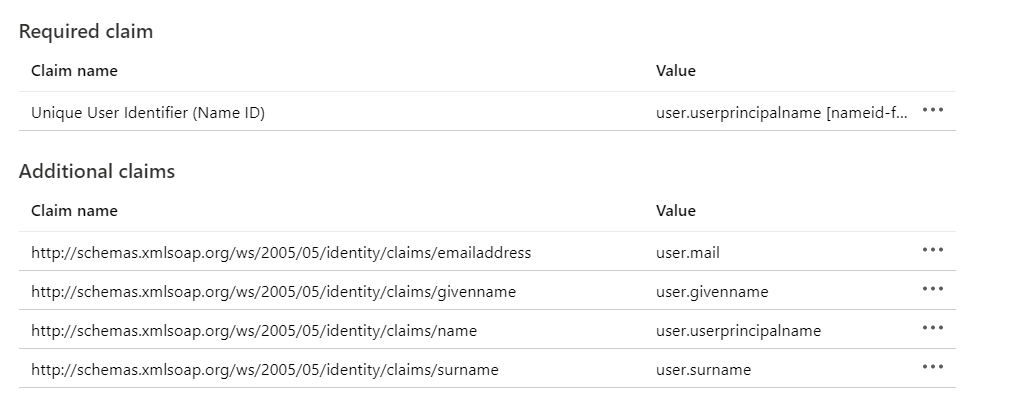
For LUY we need "Mail", "Given Name", "Surname", "Login" and "Role". In the default setup of "Attributes & Claims" only the roles are missing.
Click on "Add a group claim"
Choose the "Groups"/"Roles" which should be matched with the LUY roles later
For our example we used the following setup
Click on "SAVE" and the missing "Claim" is generated

On our example the "Mail" is our "Login" and our configuration looks like this:
Download the SAML Signing Certificate:
Click on "Download" for the "Certificate (Base64)" certificate
Save the certificate on a local created folder
Before we start to configure LUY for "Azure" copy the following value in a separate textfile
The "Application ID" from "Manage" - "Properties"
The "App Federation Metadata Url" from the part "SAML Signing Certificate"
Create and finish the Keystore:
Go into the folder where the "Certificate (Base64)" is saved
Create the keystore
CODE
|
Then the downloaded certificate is imported into the keystore
CODE
|
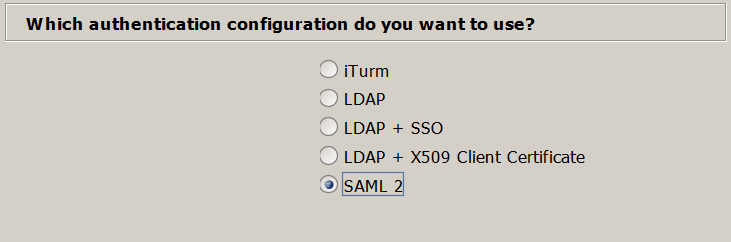
Execute the LUY Setup:
Choose "SAML2" for "Which authentication configuration do you want to use?"
Click on "Weiter"
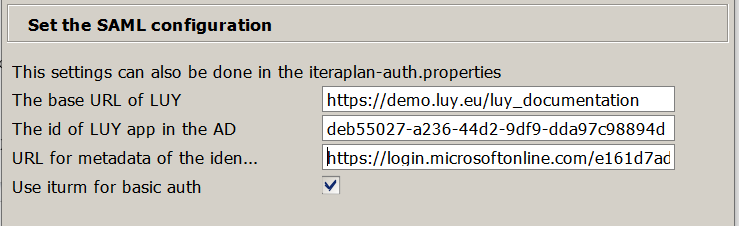
Enter the following values and click on "Weiter":
"The Base URL of LUY" is the same as the "Sign on URL"
"The id of the LUY app in the AD" is the "Application ID"
"URL for the metadata of the iden..." is the "App Federation Metadata Url"
"Use iturm for basic auth" should be set as active
The next step is to adjust or replace the "Claims" and click "Weiter":(Copy the URL's of the claims from you "Enterprise Application")
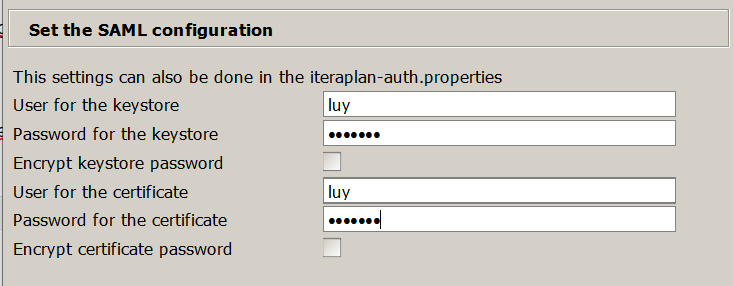
The last step is to enter the credetials for the keystore
Click on "Weiter" and finish the setup
When the setup is finished start the "Tomcat" service
After "LUY" is deployed on "webapps" stop the "Tomcat" service
Copy the created keystore in the folder "Tomcat/webapps\LUY\WEB-INF\classes\security"
Start the "Tomcat" service
Open LUY

Initial role for LUY:
Stop the "Tomcat"
Go into the file "iteraplan-auth.properties" of the deployed LUY instance
Set the value "iteraplan_Supervisor" for the property "saml.defaultRole="
(saml.defaultRole=iteraplan_Supervisor)Start the "Tomcat"
Open "LUY"
Now the logged in user is "iteraplan_Supervisor" and has all permissions
Create the roles which are matching with the "Groups" from your Azure AD
Remove the entry from the "saml.defaultRole"
Restart the "Tomcat" service
After the "Restart", LUY starts with SAML2 and uses the assigned Roles for the different users.