Attribute and attribute groups
Attributes
The “administration” tab in the “attribute” section shows a list of all existing attributes.
The list’s toolbar contains several categories.
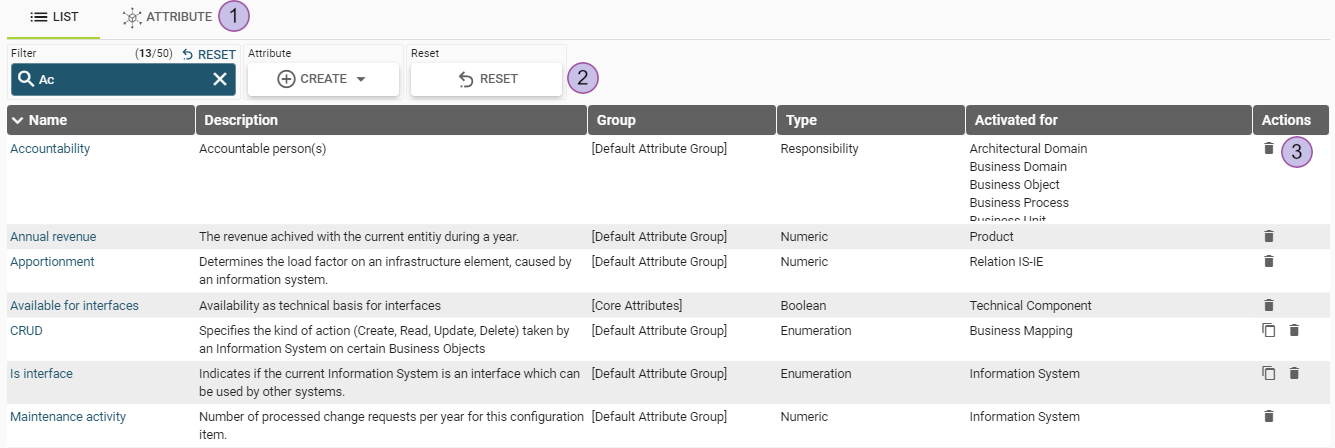
Attribute tab: switch to the single attribute view
Toolbar:
Filter category:
Number of displayed elements and all available elements
Quick search
Reset button to reset only the filter category (only visible if the list is filtered)
Create attribute
Reset
Reset the list to the initial configuration
Delete attribute
Managing attributes in list tab
Create a new attribute
After clicking on the "create element" button, a dropdown with the attribute types appears.
There are different types of attributes:
Enumeration
Numeric
Text
Date
Date interval
Responsibility
Boolean
After selecting the type for a new attribute, the single element view for the specific attribute is opened in create mode.
Copy an existing enumeration attribute
It is possible to copy enumeration attributes by clicking the "copy" icon in the action column. By clicking the icon, the page for the copied attribute is opened for further editing. The values of the copied enumeration attribute are carried over.
Delete an attribute
Attributes can be deleted by clicking the "delete" icon (3). A confirmation dialog will open.
A date attribute cannot be deleted if one or more date intervals have a dependency on it.
When deleting an attribute, all its data values from all elements of all building block types to which the attribute was assigned are permanently removed from LUY.
Single attribute view
In the single attribute view, all information about the attribute and its properties are shown.
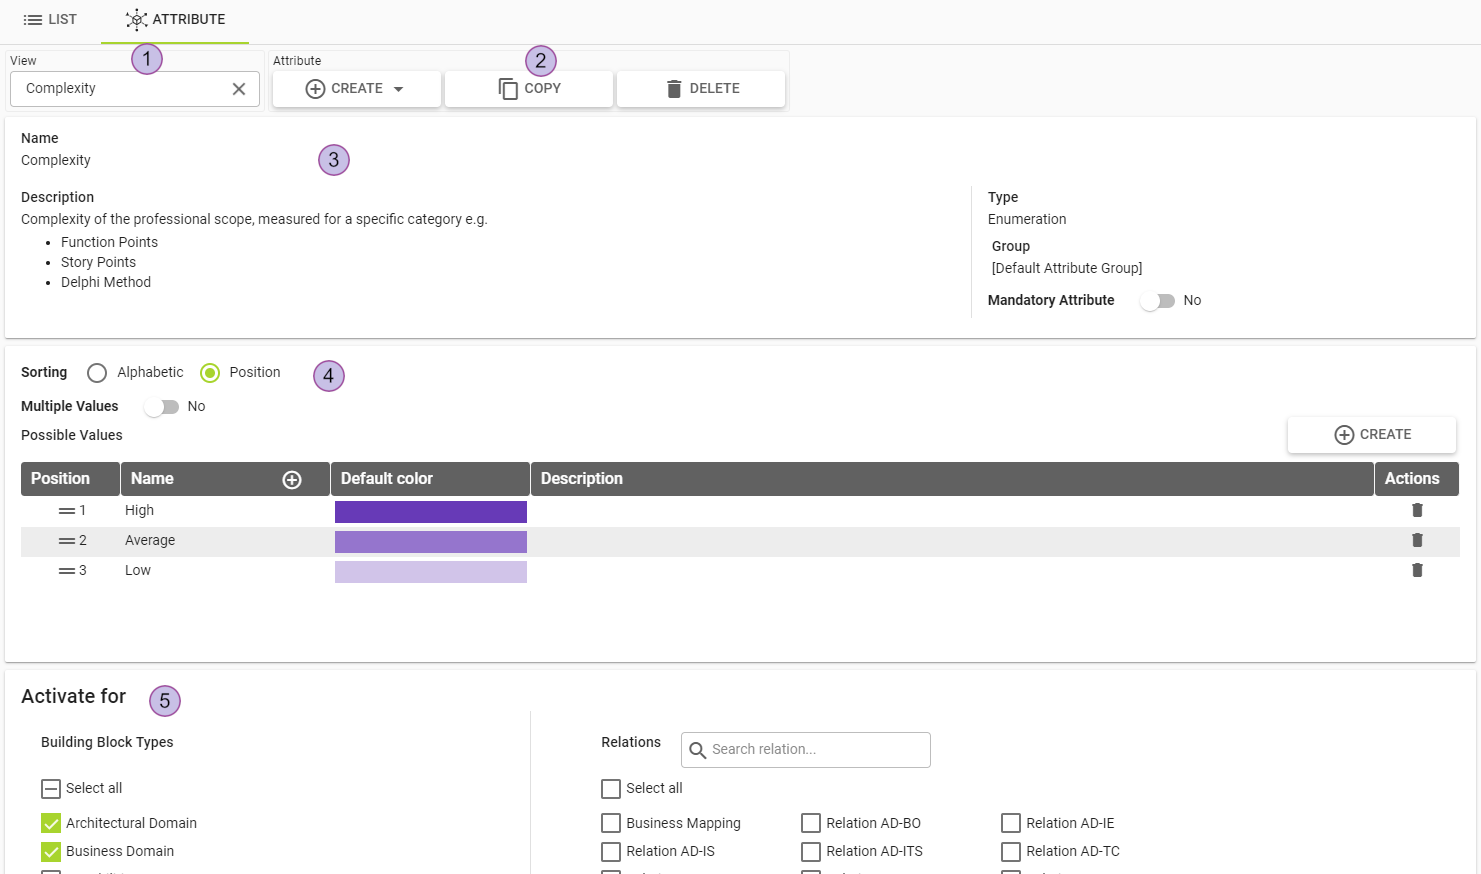
Select an attribute
Create a new attribute, copy, delete the currently displayed attribute
General information about the attribute, such as name, description, type, attribute group and the option to set it as mandatory
Attribute editing details
“Activate for”-section shows all building block types and relations which can be activated for this attribute
An additional copy button is available for enumeration attributes.
Create a new attribute
When creating an attribute, a unique name is mandatory and at least one building block or relation needs to be selected.
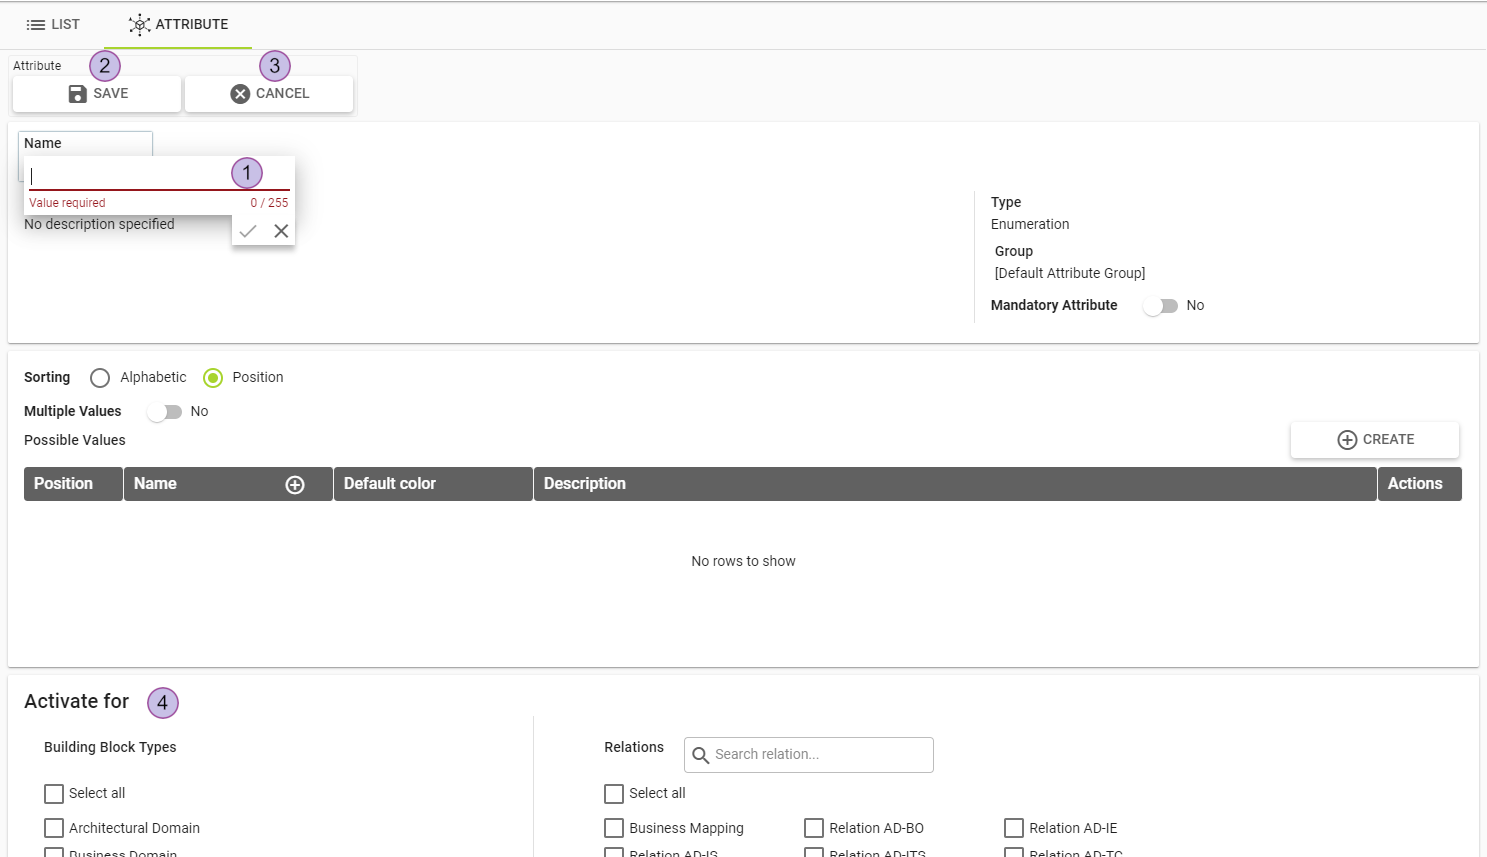
Attribute name
Save button (only active, if the name field is filled and at least one building block type is selected)
Cancel
“Activate for”-section shows all building block types and relations which can be activated for this attribute
Editing attributes
Except for the attribute type, every property of an attribute can be edited. Different editors depending on the attribute type are opened by clicking on the pencil icon.
Changes will be shown after reloading LUY by pressing F5.
Group
Select the attribute group for the attribute. By default, the attribute is part of the "default attribute group".
Mandatory attribute
Activate this switch to set it as mandatory.
If this attribute is empty/not assigned, a warning icon will be displayed in the single element view of a building block.
Options for the different attribute types
Enumeration attributes
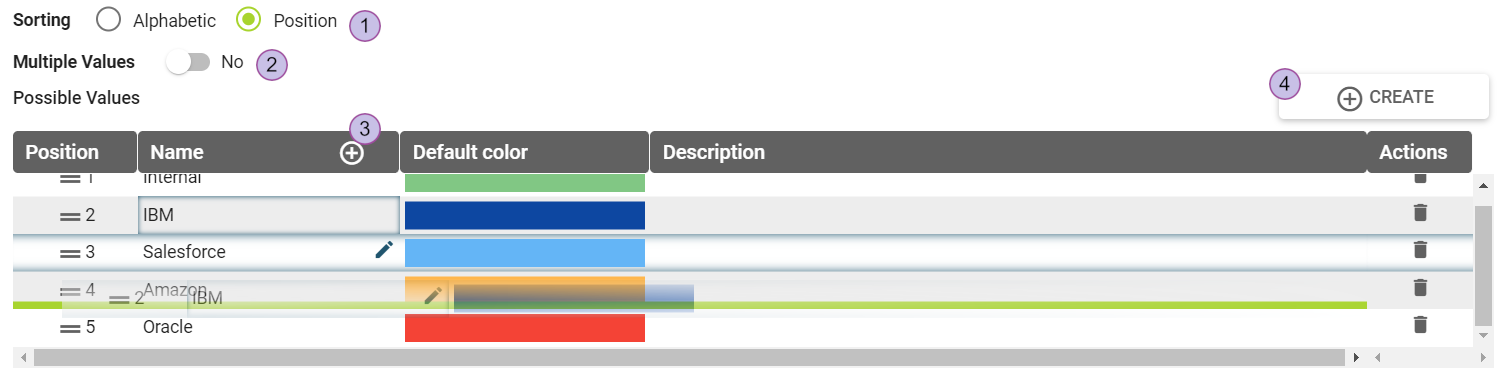
Sorting determines the order of all attribute values.
If "position" is selected for sorting, the position of a value can be changed by drag-and-drop. The values in the position column will be automatically updated.
If "alphabetical" is selected for sorting, the list is sorted accordingly. Drag and drop is disabled in this case and the "position" column is not shown."Multiple values" can be enabled for the enumeration attribute. When this option is activated, multiple values can be selected for one attribute.
Create new values by clicking on the plus icon (3) in the name column or click the “create” button (4). More values can be added later, after creating an attribute. New values will be automatically sorted at the end of the list.
“Create new value” dialog for enumeration attribute
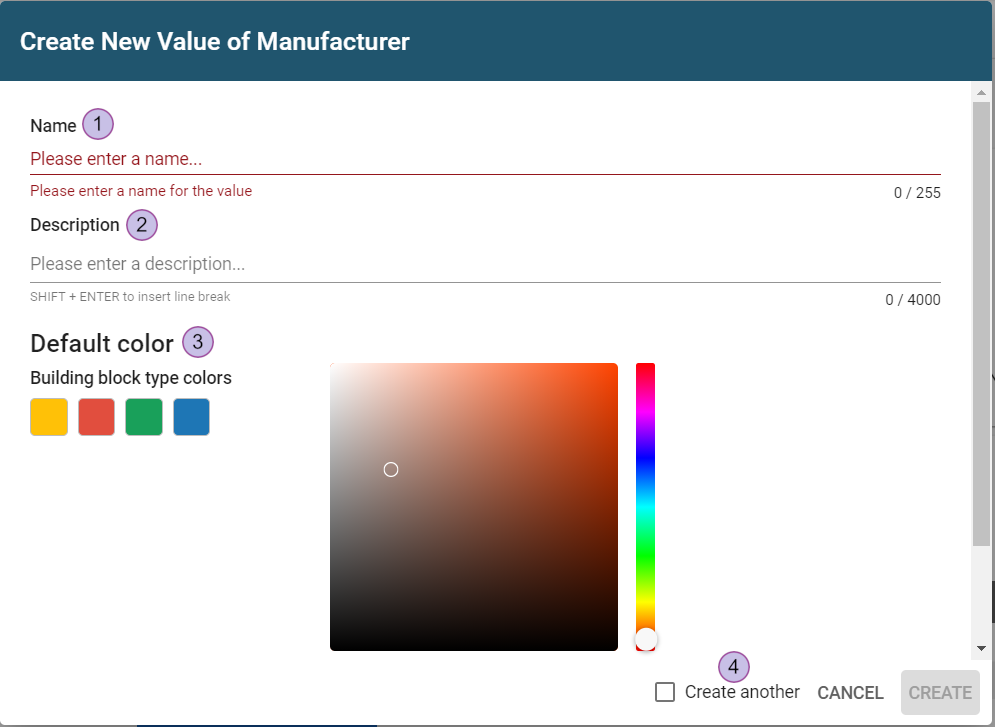
Name
Description
Color
Checkbox “create another” will reopen an empty create dialog after saving a value
Numeric attributes and ranges
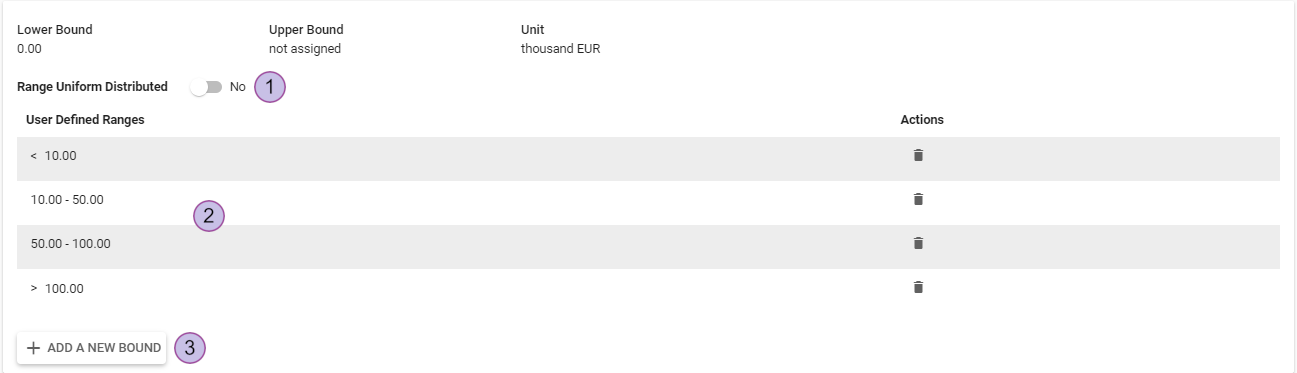
Select for uniform distribution
For better visual clarity in diagram reports with numeric attributes, values are grouped into ranges. If you select "range uniform distributed" when editing the attribute, LUY automatically calculates the ranges so that the values are distributed equally. Ranges can also be set manually.User defined ranges
Adding a new bound: The bound is added at the appropriate position.
Ranges are defined as follows: The first range contains all numbers smaller or equal to the lower bound. The last range contains all numbers larger than the upper bound. Other ranges contain all numbers between the bounds and the value of the upper bound.
Text attributes
There are two types of text attributes: single-line or multi-line. Single-line attributes allow a maximum of 255 characters whereas multi-line attributes can contain an unlimited number of characters. Only multi-line text attributes allow for the XWiki syntax.
Date attributes
Date attributes can be used either as date or as start/end date for date intervals.
Date attributes used in a date interval cannot be deleted. The dependency in the date intervals must be deleted beforehand.
Date intervals
Date intervals can have a start and end date. It is possible to use a date attribute as start or end date.
The set color of the date interval is used in visualizations and the calendar view.
When removing a dependency on a date attribute, the start/end values in the interval are kept. Multi-mode can be used to clear the start/end values of a building block type.
When adding a dependency to a date attribute, the start/end values in the interval are removed and replaced by the values of the start/end date attribute.
If a start and/or end date attribute is used, the action of saving or editing the date interval can take longer than usual.
Responsibility attributes
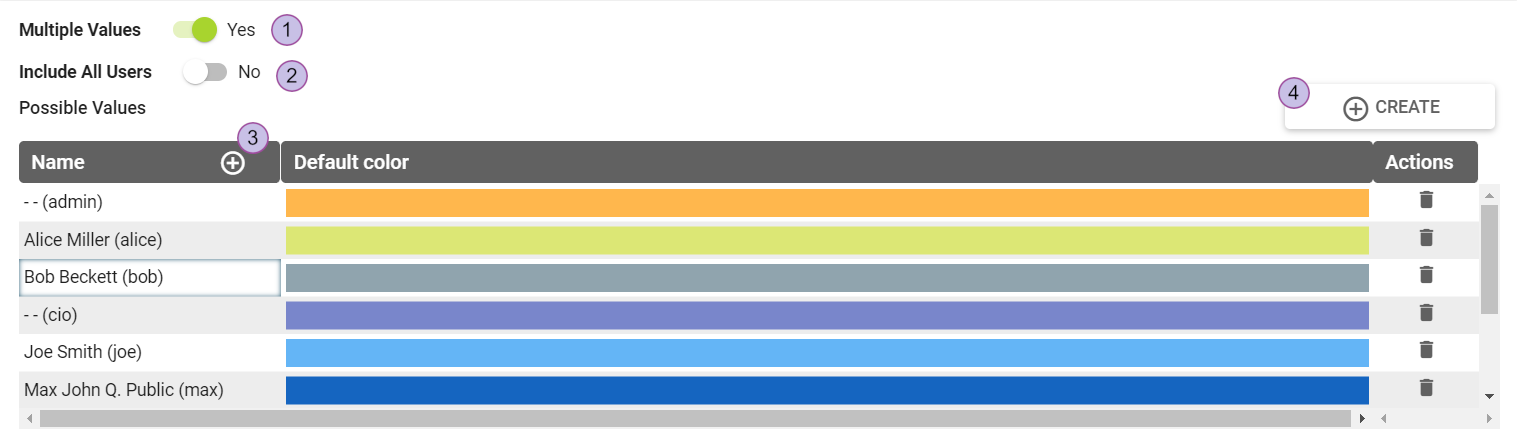
“Multiple values" can be enabled for the responsibility attribute. When this option is activated, multiple responsible persons can be selected. Values of the responsibility attribute can be users and user groups of LUY.
Activating "include all users" adds all users of the application into the list of possible values, user groups are removed from the list. The list will be updated automatically when the a new users are added to the application. In this case, users and user groups can't be added or removed manually from the list of "possible values". Deactivating the switch "include all users" will not change the current list.
Add users by clicking on the plus icon (3) in the name column or click the “create” button (4). More users can be added after creating the attribute.
Color is the only editable value for the responsibility attribute.
“Create new value” dialog for responsibility attribute
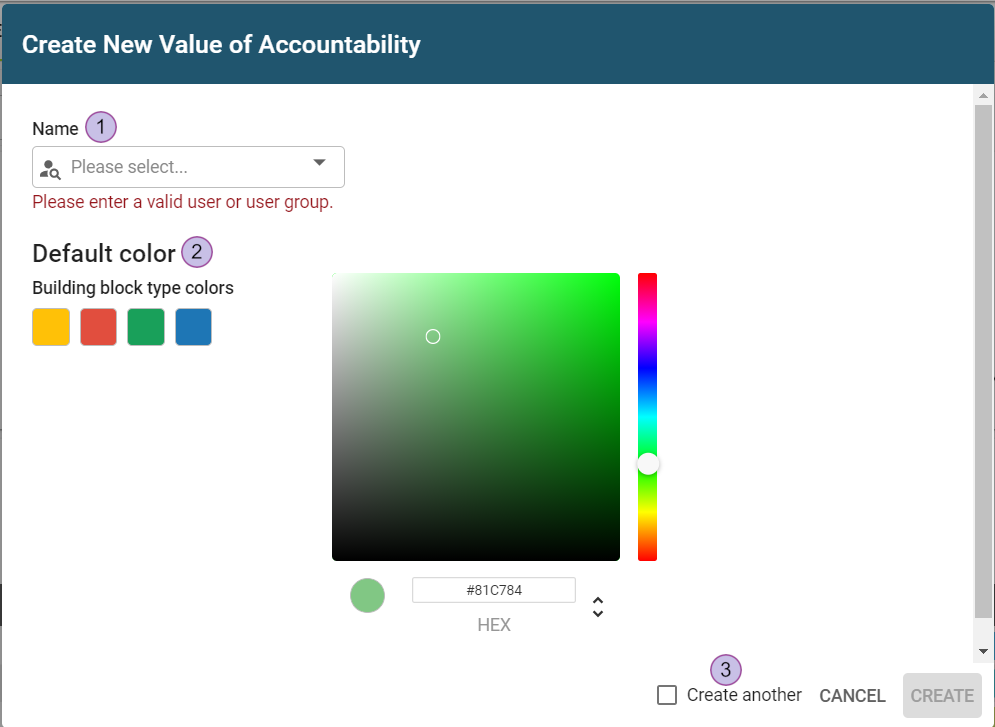
Dropdown list with the selection of possible users and user groups
Color of the attribute value
Checkbox “create another” is used to reopen the dialog after saving the value
Boolean attributes
Consists of an “Yes” and a “No” value. This attribute type cannot be further edited.
“Activate for” section
Each attribute type has to be activated for at least one or more building block types or relations.
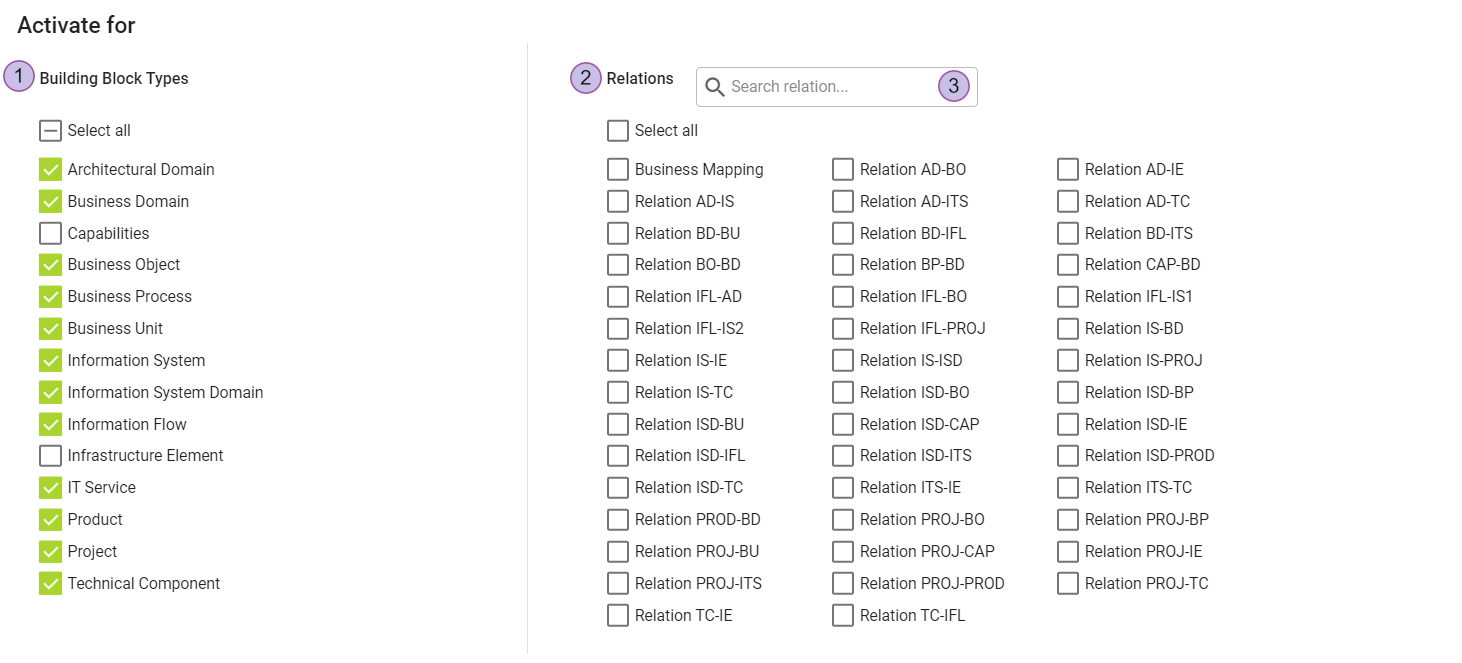
List of all available building block types
List of all available relations
Quick search for relations
Attribute groups
Attributes in LUY are organized into groups. Each attribute group has a name and description and contains a number of attributes.
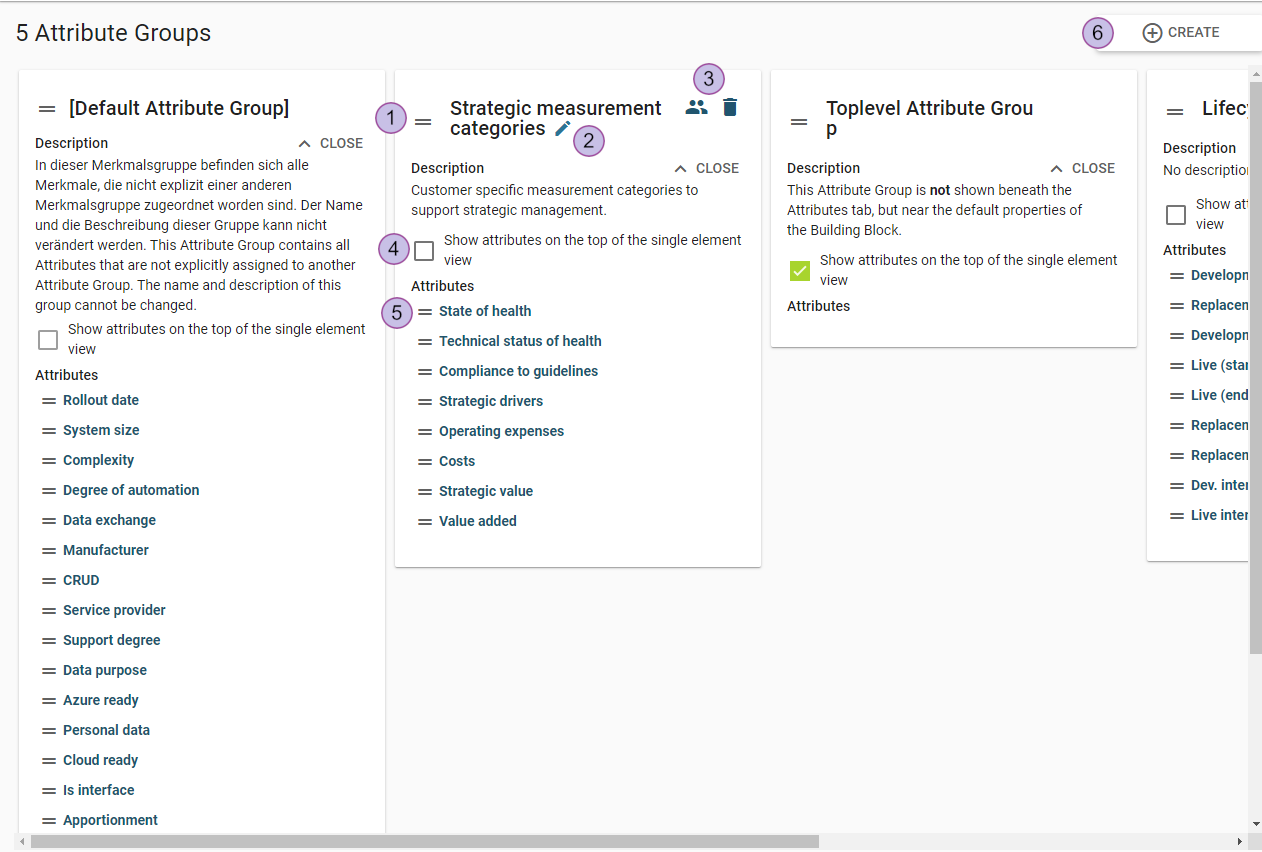
Drag-and-drop to change the attribute group position
Group name editor
Group icons: Toggle description, open roles and permissions dialog, delete group
Checkbox to "show attributes on the top of the single element view"
Drag and drop to change the attribute position
Create attribute group
Edit attribute groups
To change the attribute name or description, click on pencil icon. The attribute group name must not be blank and has to be unique.
The up/down arrow icon is used to fold/unfold the group description. When you hover the mouse over the group, additional icons appear in the top right corner of the group container (4): set permissions and delete group.
"Show attributes on the top of the single element view" checkbox (5): By setting this option, all attributes within the group are displayed at the top of the single element view instead of the default location within the attribute tab.
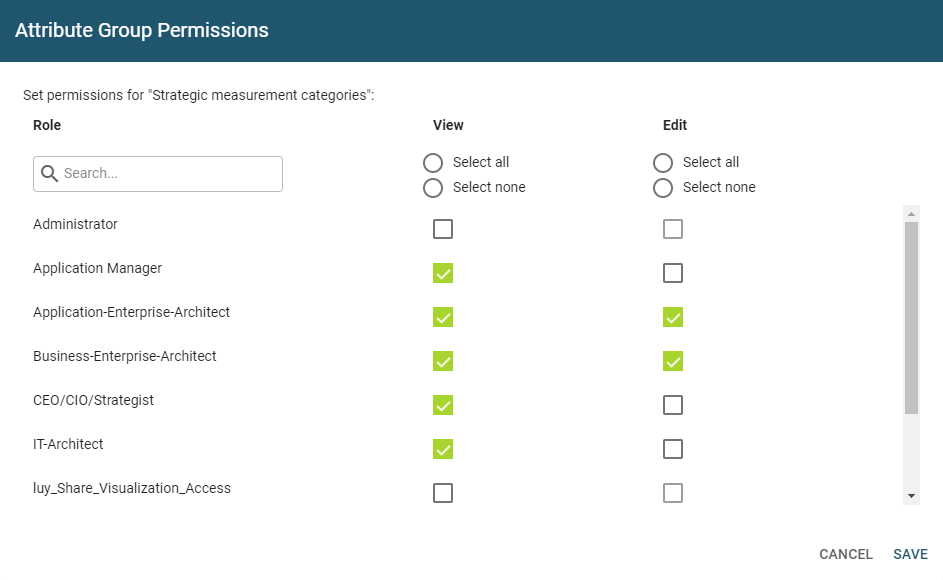
Set permissions
The "attribute group permissions" icon opens a dialog to edit the roles and permissions concerning the attribute group. All configured roles can be individually set using “view” and “edit” permissions.
New attribute group
To create an attribute group, click the "new" button and specify the name in the popup dialog.
Delete an attribute group
With the "delete" icon the attribute group can be deleted. All attributes from the deleted group will be moved to the bottom of the attribute group “[Default Attribute Group]”.
Order of attribute groups and attributes
To change the order of attribute groups or attributes, drag them to a new position using the drag handle = (1) and (5). Additionally, attributes can be dragged to another attribute group with this handle.
The group [Default Attribute Group] is static: Its name cannot be edited or deleted and the position cannot be changed.
Naming for attribute and attribute groups
There is a list of internal names that cannot be used for attribute and attribute group names: