Assignments help you keep LUY data up to date by turning data update requests into clear, structured tasks with defined ownership. When creating an assignment, LUY automatically identifies the appropriate assignees based on responsibility attributes, giving you transparency into who is expected to update each element.
Users with the "Create Nova assignments" functional permission can create and manage assignments. Users with this permission see the Created by me tab and the New assignment button. Users without this permission only see the Assigned to me tab.
The Assignments feature provides the following capabilities :
-
Create assignments: Define which elements and attributes need updating, assign responsible users, and set a due date through a five-step guided workflow.
-
Draft auto-save: Progress is automatically saved at every step, allowing assignments to be paused and resumed at any time.
-
Permission preview: Review which assignees can and cannot edit each element before publishing. The Further info column highlights missing assignees, missing edit permissions, and missing email addresses to help resolve issues before publishing.
-
Configurable questions: Add guidance text for each selected attribute while creating an assignment. These questions are displayed to assignees during the assignment workflow, helping them understand what information is expected.
-
Email notifications: Configure invitation and reminder emails, preview them before publishing, and automatically notify assignees when an assignment is published. Reminder emails are sent according to the configured reminder schedule.
-
Assignment details page: Monitor assignment progress from a dedicated details page that provides an overview of assignment information, assigned elements, assignees, completion status, and completion dates.
-
Copy assignments: Create recurring assignments more efficiently by copying an existing assignment. The copied assignment is created as a draft and includes its configuration, due date, questions, assignees, and reminder settings.
-
Complete assignments: Assignees complete assignments using a guided, element-by-element workflow. Responses are saved automatically as they work, providing a smooth completion experience.
-
Delete assignments: Delete one or multiple assignments that are no longer needed directly from the Created by me tab. Confirmation dialogs help prevent accidental deletion.
Creating an assignment
Creating an assignment follows a five-step guided process. Your progress is automatically saved as a draft after each step. Saved drafts appear in the Created by me tab with the status Draft and can be reopened at any time.
Step 1 – general
-
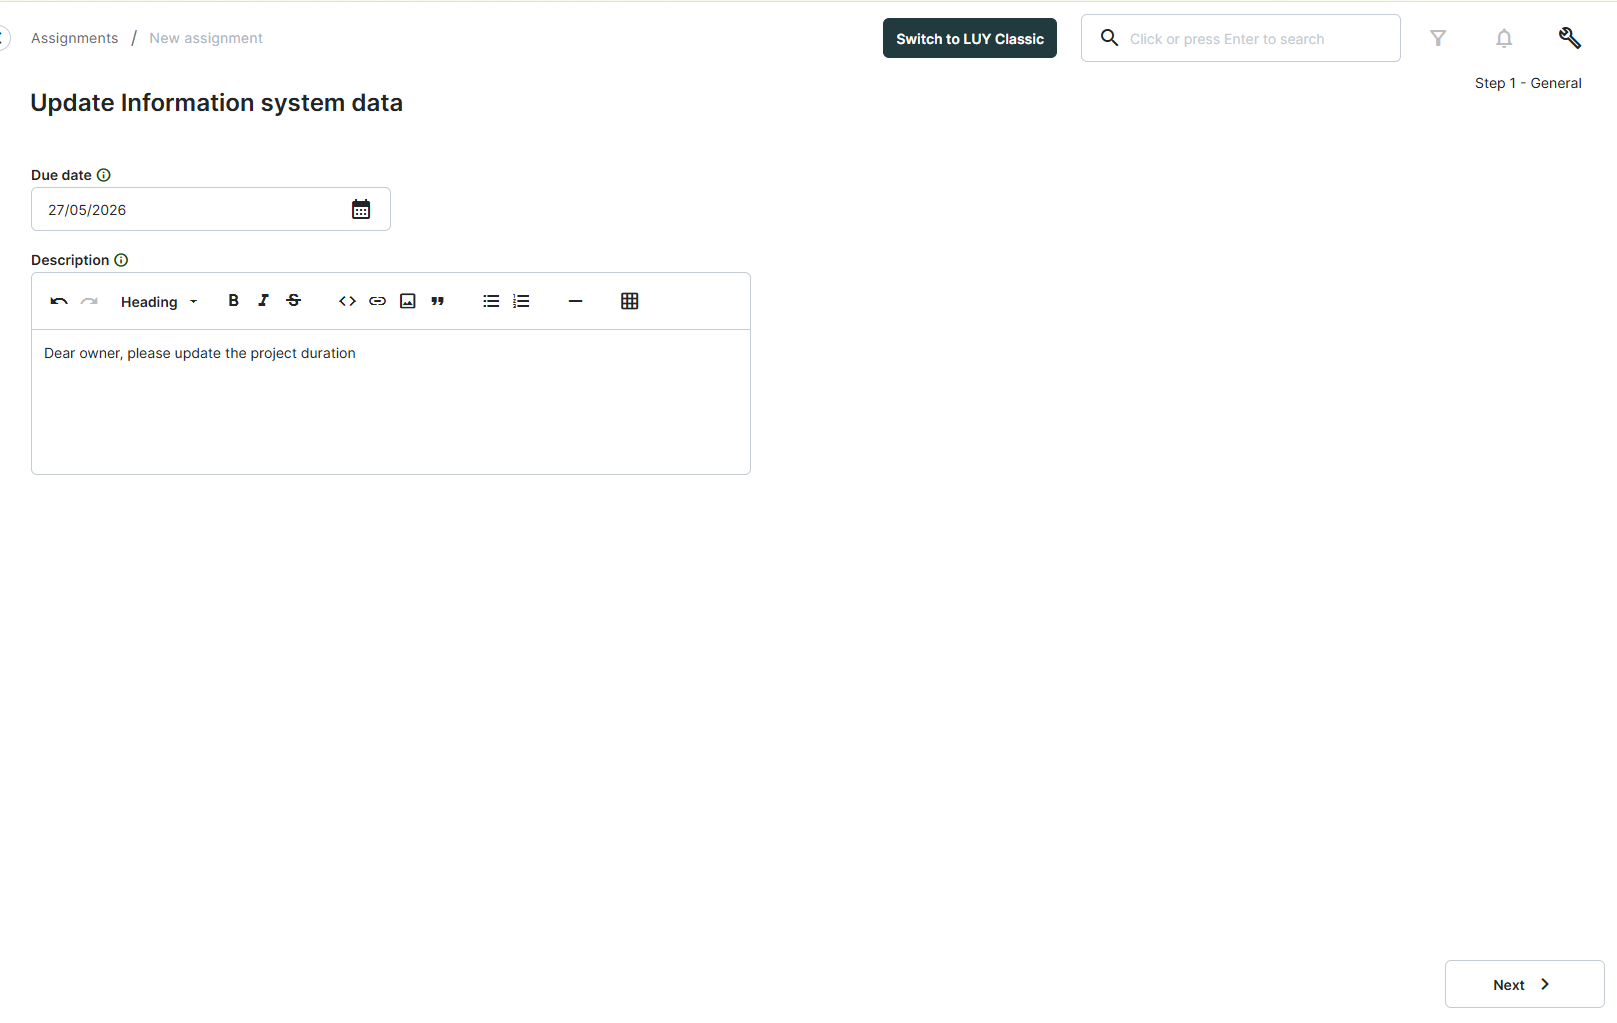
Click New assignment in the top right corner of the Assignments overview page.
-
Enter a Title for the assignment.
-
Add a Description to give assignees context.
-
Set a Due date, which defines the deadline by which all assignees must complete their work. Due dates apply until 23:59 on the selected day. Today's date and past dates cannot be selected.
-
Click Next to save and proceed.
Step 2 – data & assignees
Element type
Select the element type the assignment covers, for example information system. Only element types with a configured responsibility attribute can be selected. Element types without a responsibility attribute are shown but disabled. To make an element type available, go to Administration > Attributes and assign a responsibility attribute to it.
Elements
By default, all elements of the selected type are included in the assignment. Clicking Filter elements opens the advanced filter to narrow the selection to a specific subset. A badge next to the button shows how many elements are currently selected.
Attributes
Select the attributes that assignees should review or update. All custom attributes assigned to the selected element type are available, as well as the built-in Description attribute.
Responsibility attribute and assignee preview
The selected responsibility attribute determines the assignee for each element. The preview table shows each element, the assigned user, and whether the user has edit permission for that element.
|
Column |
Description |
|---|---|
|
Name |
Element name |
|
Assignee |
User set via the selected responsibility attribute |
|
|
Assignee's email address |
|
Can edit |
Whether the assignee has write permission for this element |
|
Further info |
Displays warnings that may prevent the assignee from completing the assignment |
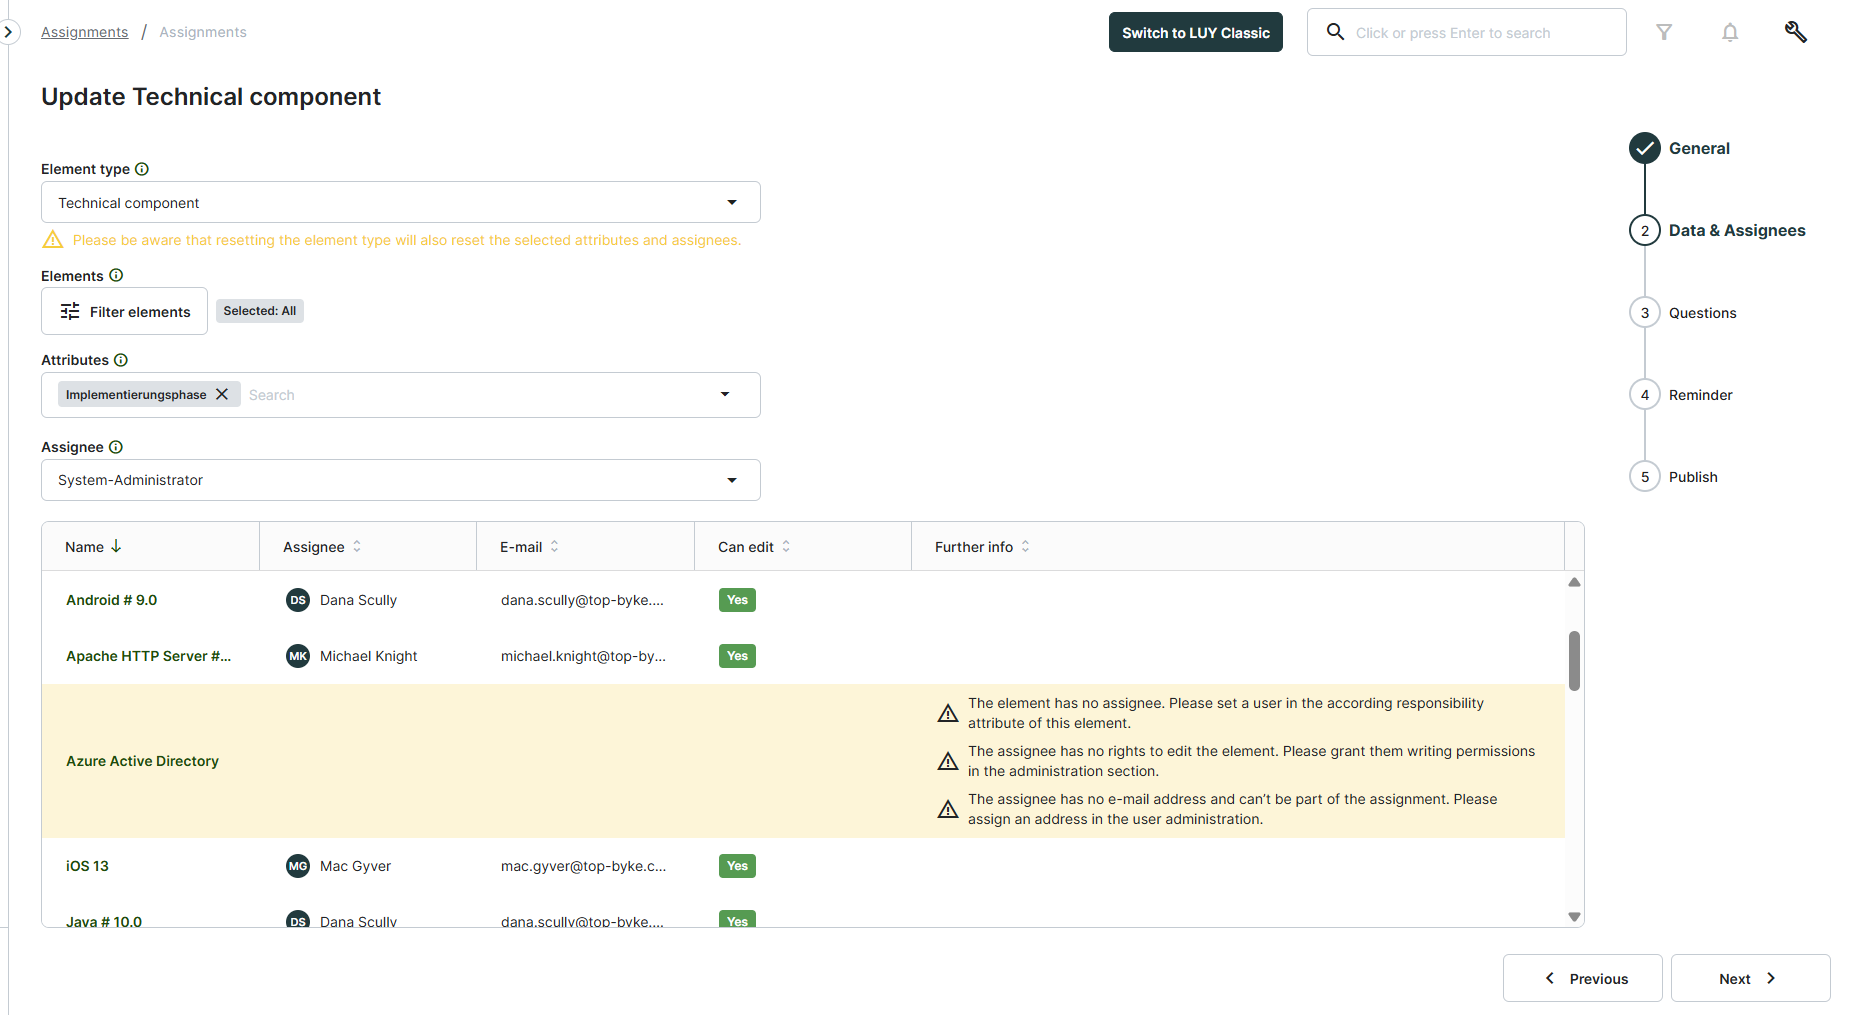
The Further info column may show the following warnings:
-
No assignee - No user is set in the responsibility attribute for this element. Assign a user to the element to include it in the assignment.
-
No edit rights - The assignee does not have write permission for this element. Grant them the appropriate permissions in the administration section.
-
No email address - The assignee has no email address and cannot receive notifications. Assign an email address in user administration.
Resolve any warnings before publishing to help ensure that all intended assignees can receive and complete the assignment.
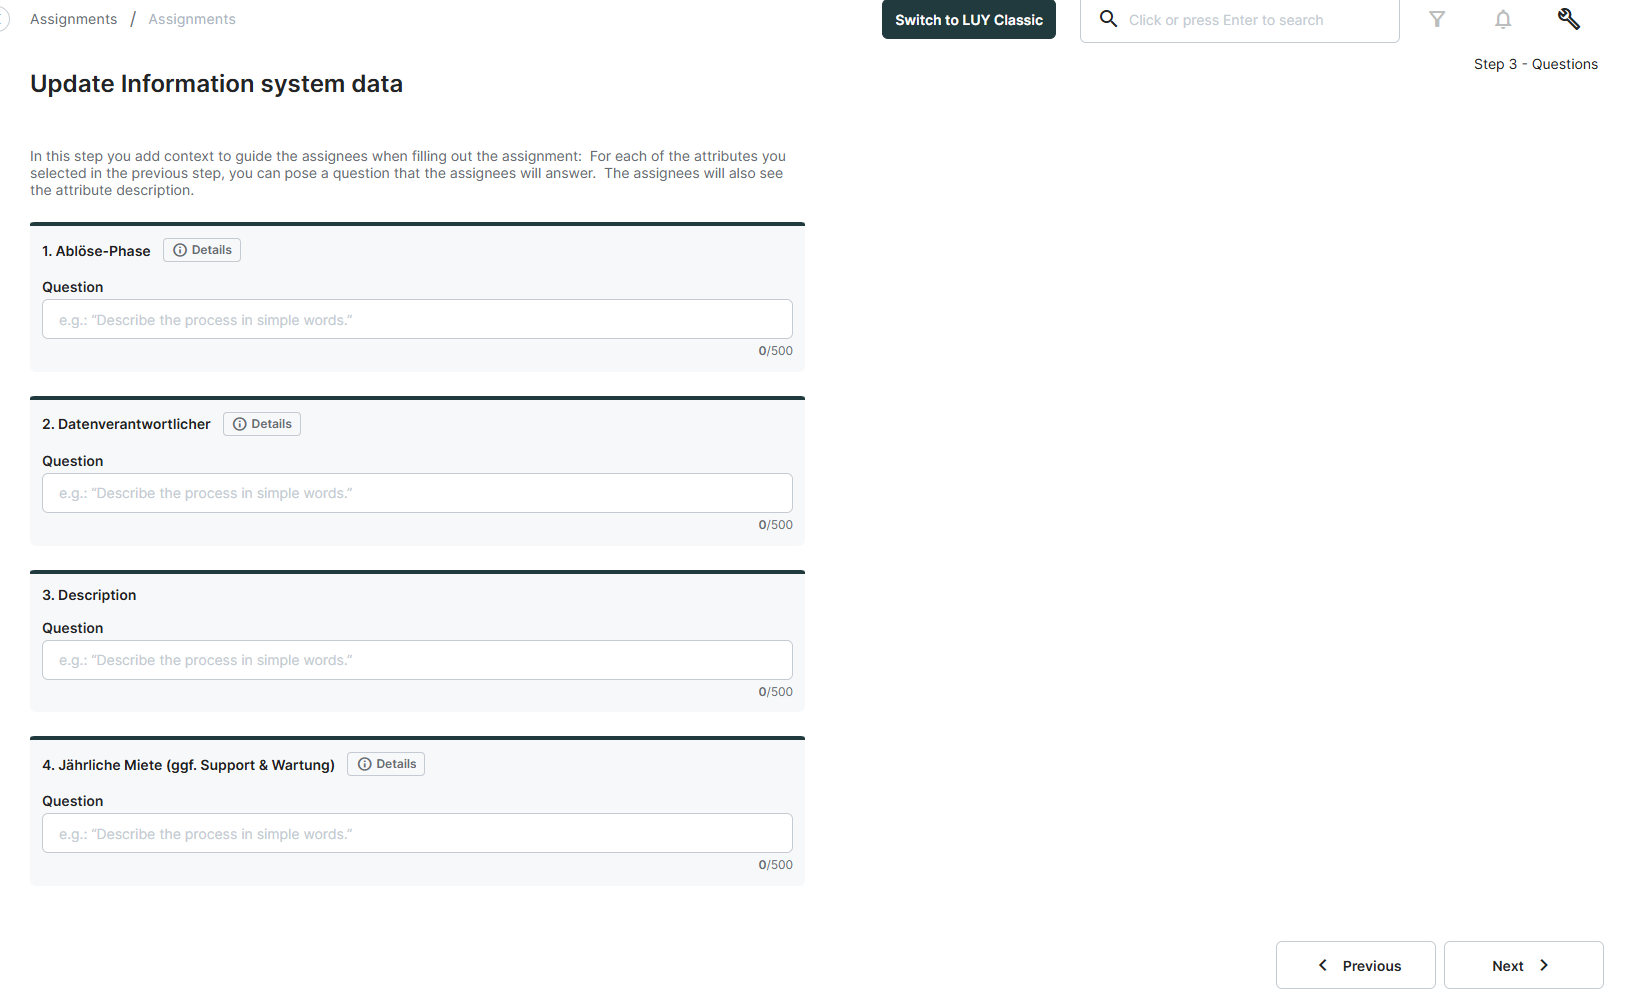
Step 3 – questions
For each attribute selected in the previous step, you can optionally add a question or description to provide guidance to assignees.
These questions are displayed to assignees while they complete the assignment, helping them understand what information is expected for each attribute.
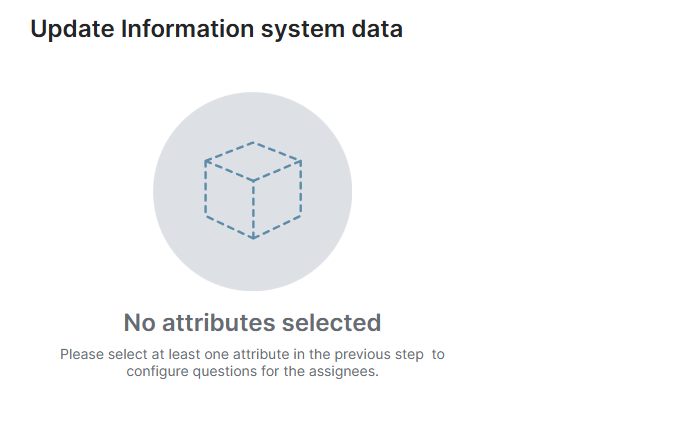
If no attributes were selected in Step 2, a placeholder is shown on this page.
Step 4 – emails & reminders
Configure invitation and reminder emails before publishing the assignment
The Schedule reminder mail option lets you configure reminder emails with two frequency options:
|
Option |
Sent out: |
|---|---|
|
Once, 5 days before due |
A single reminder will be scheduled 5 days before the due date. If that day falls on a weekend, the reminder will be scheduled for the preceding Friday. |
|
Weekly, until due |
A weekly reminder will be scheduled on the same weekday as the due date, continuing until the due date. If the due date falls on a weekend, reminders will be scheduled for the preceding Friday. |
Custom text can also be added to the reminder email.
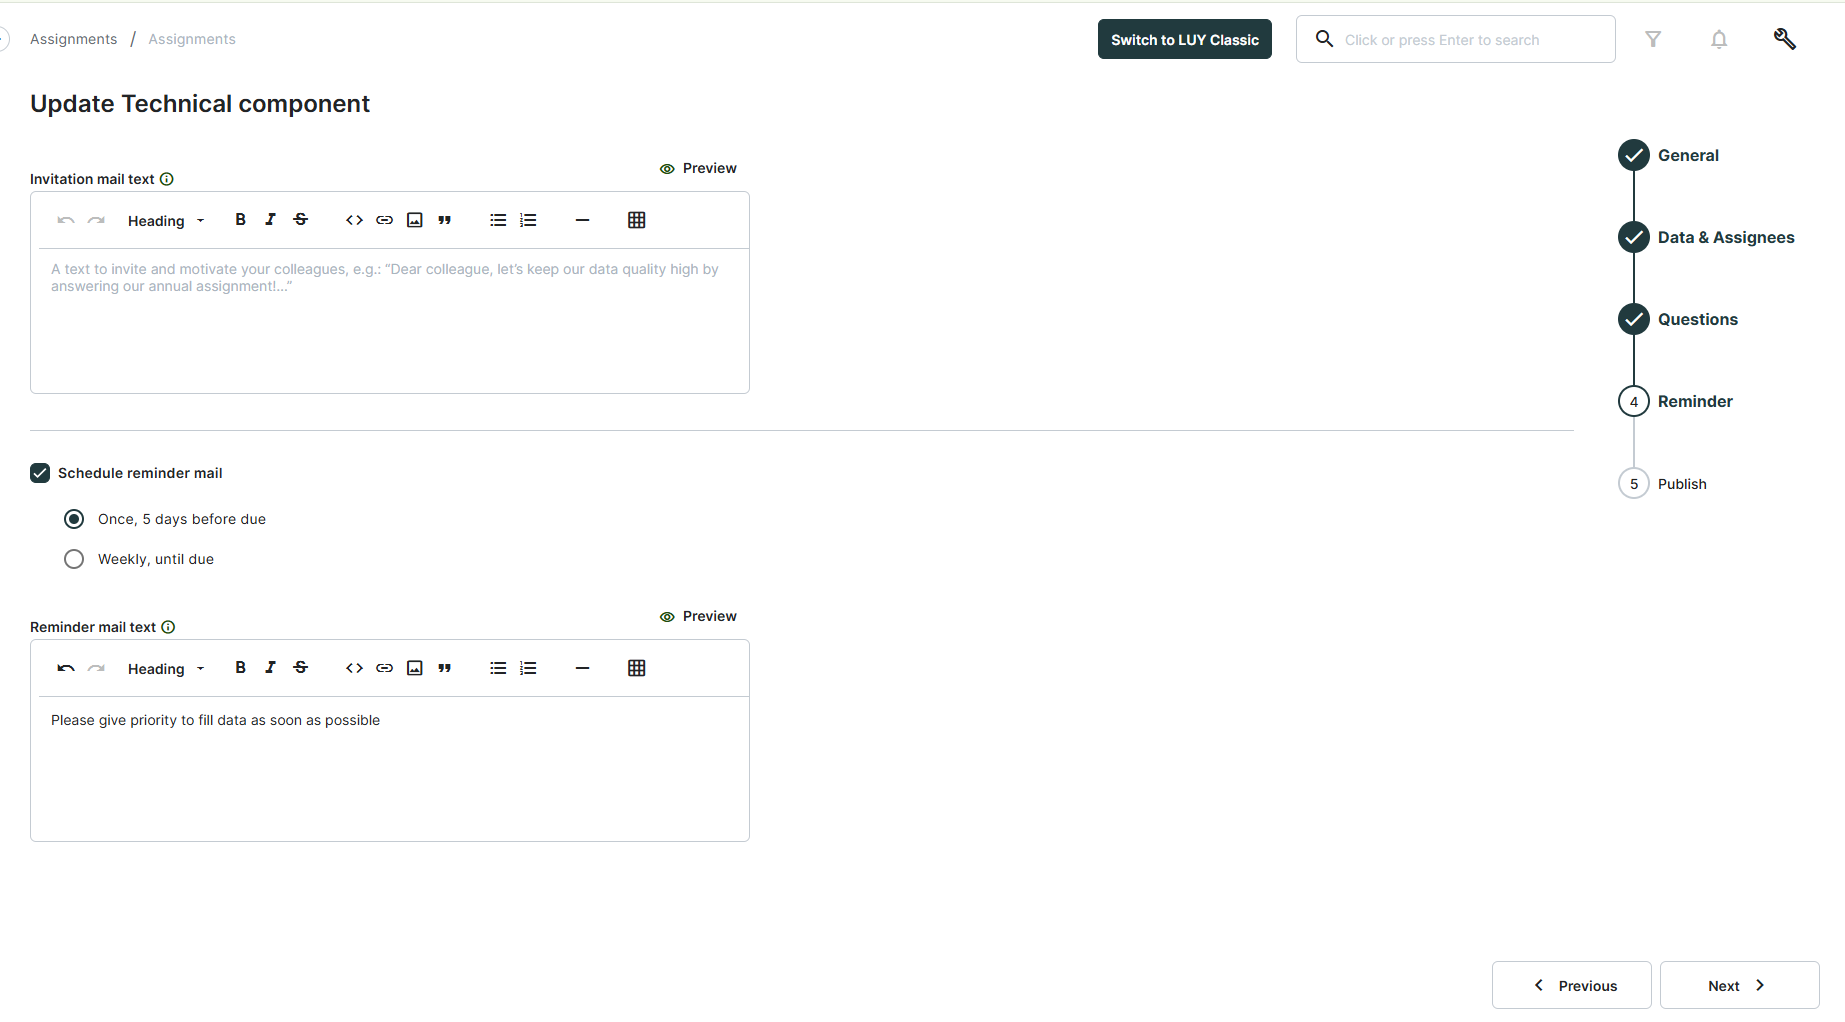
Click Preview invitation email or Preview reminder email to review the email before publishing.
The preview displays the selected email as it will be sent to assignees, including the assignment title, due date, configured email text, and a link to open the assignment.
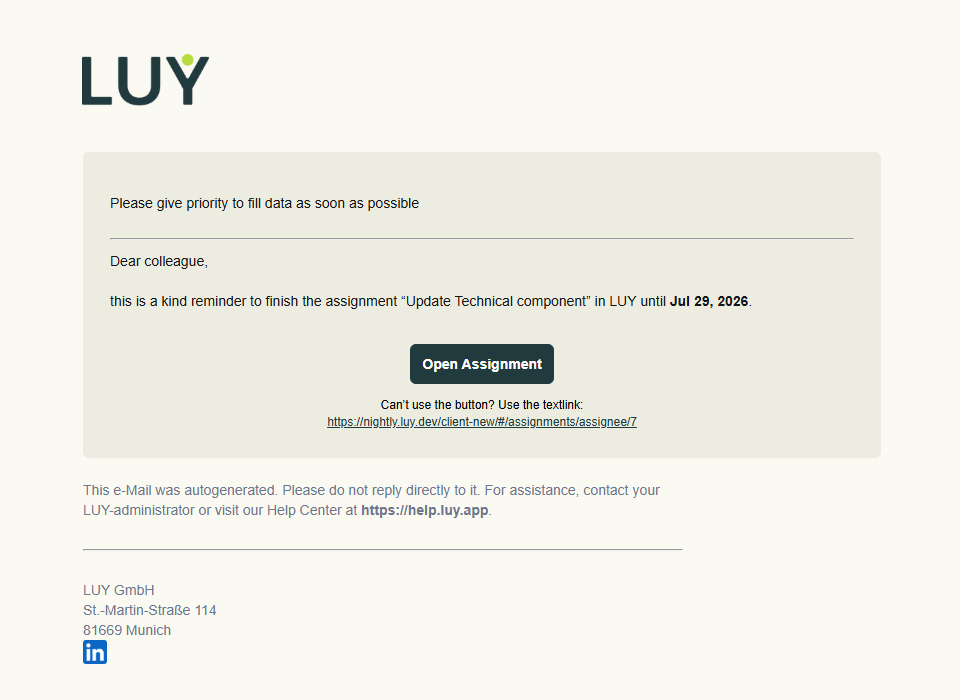
Note: Reminder emails are only sent to assignees who have an email address configured in LUY.
Step 5 – summary & publish
The final step displays a summary of all configured data: title, due date, description, element type, selected attributes, responsibility attribute, and assignee count.
-
If any assignee is missing edit permissions, the assignee count is highlighted in yellow.
-
If any mandatory fields are missing, the Publish button is disabled. Hovering over the button shows a tooltip explaining what still needs to be set.
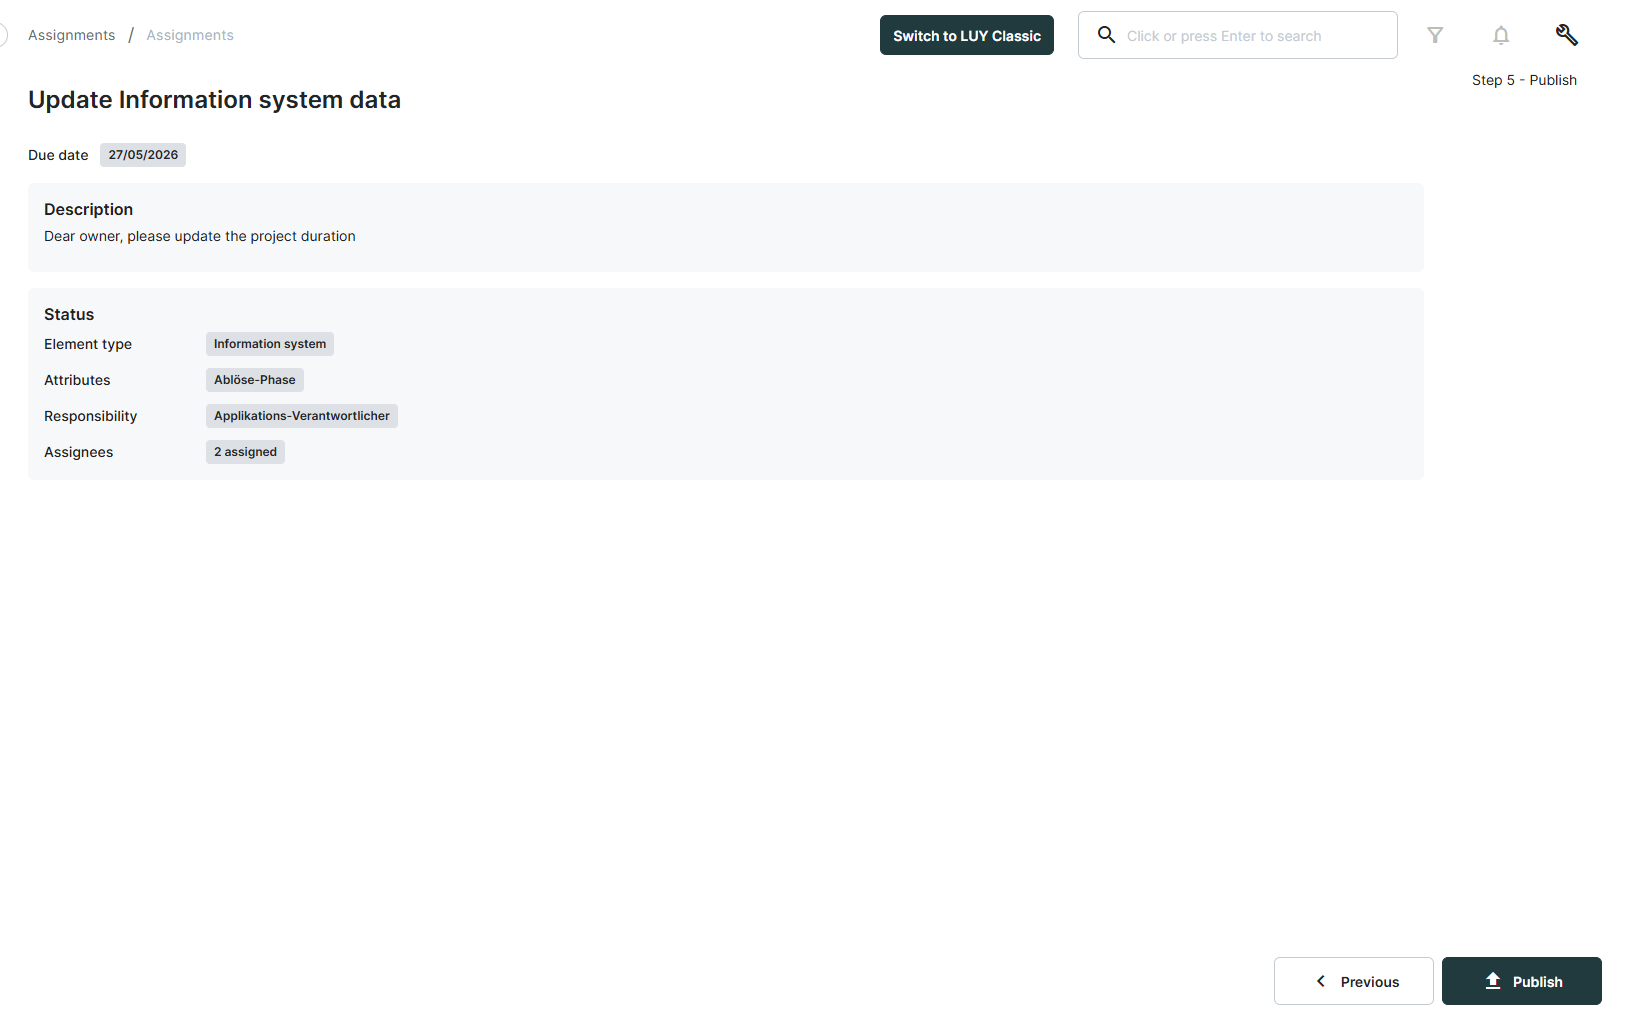
Click Publish to open a confirmation dialog. After confirming, the assignment status changes to Open and the assignment becomes visible to the selected assignees in their Assigned to me tab. Invitation emails are sent automatically and reminder emails are scheduled according to the configured reminder settings.
Once an assignment is published, the element type, attributes, and assignees cannot be changed.
Completing an assignment
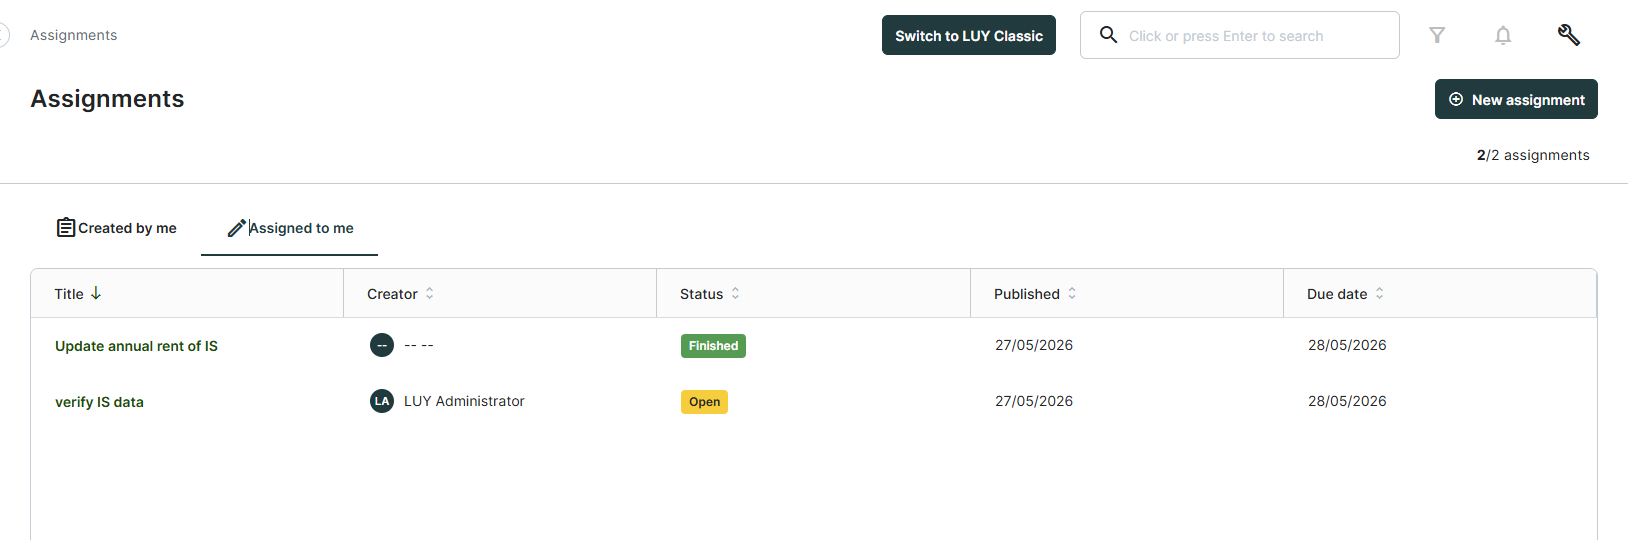
Open the Assigned to me tab on the Assignments overview page to see all assignments assigned to you. Only assignments with the status Open are clickable.
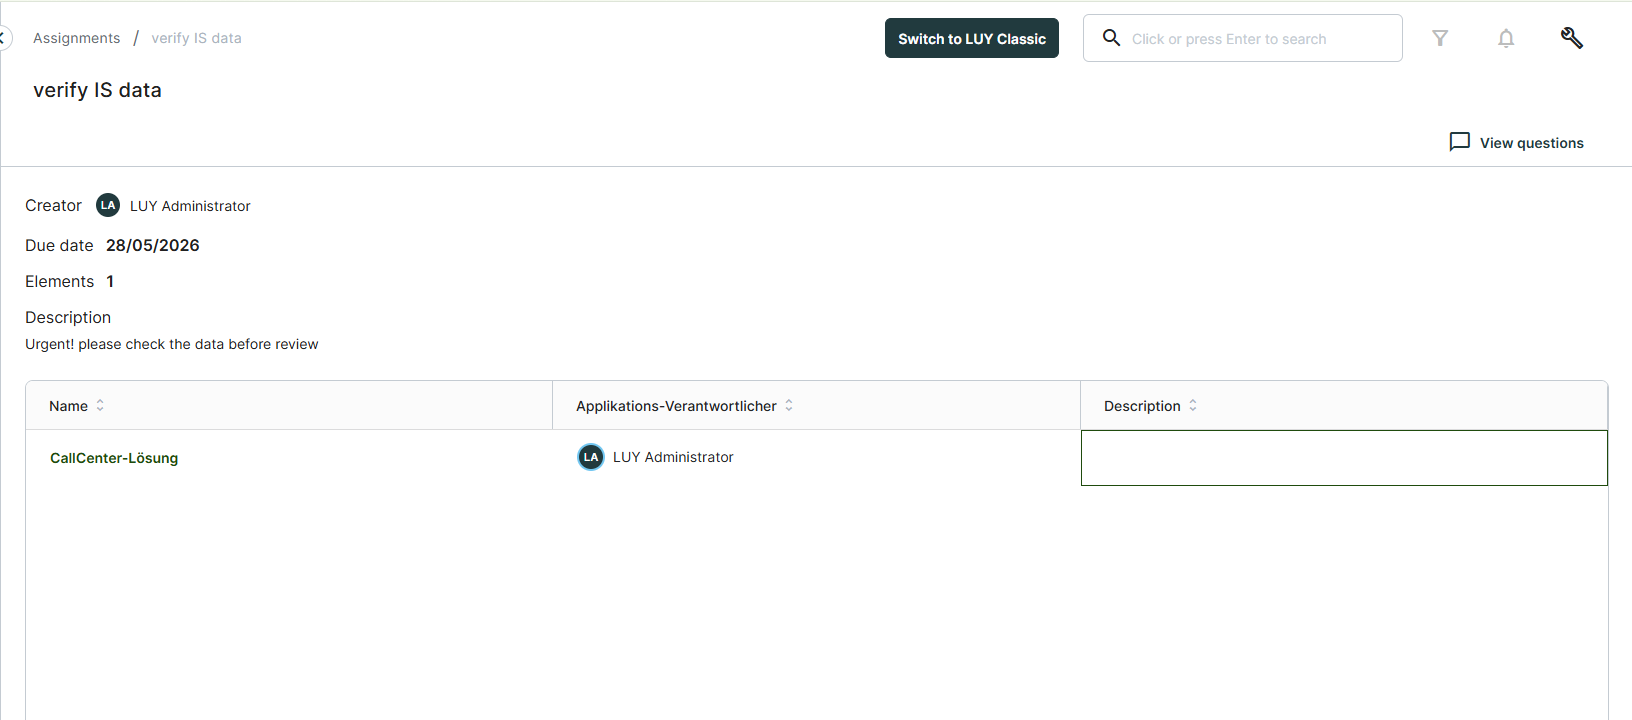
Click an open assignment to view its details, including name, due date, number of elements, and description. The editable table of elements is shown below the assignment details
To complete the assignment:
-
Review and update the attribute values directly in the table cells. The editors work the same way as in the standard table view.
-
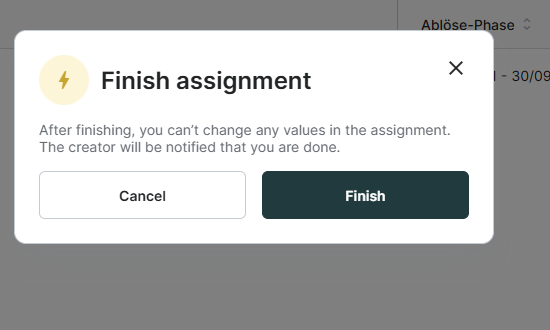
When all updates are done, click Finish at the bottom of the page.
-
Confirm the dialog to mark your part as finished.
After finishing your part, you can no longer edit your assigned elements in this assignment. The overall assignment status changes to Finished once all assignees have completed their part.
Use the question mode to step through elements one by one, answer the configured per-attribute questions, and update the relevant data.
Assignment detail page
Clicking the title of an open or finished assignment in the Created by me tab will open a detail page. The detail page provides a complete overview of the assignment, including the assignment title, published date, due date, description, element type, selected attributes, and responsibility attribute. The page contains two tabs:
Elements, which lists all assigned elements together with the assigned user, completion status, and completion date.
Assignees, which lists all assignees together with their assigned elements, completion status, and completion date.
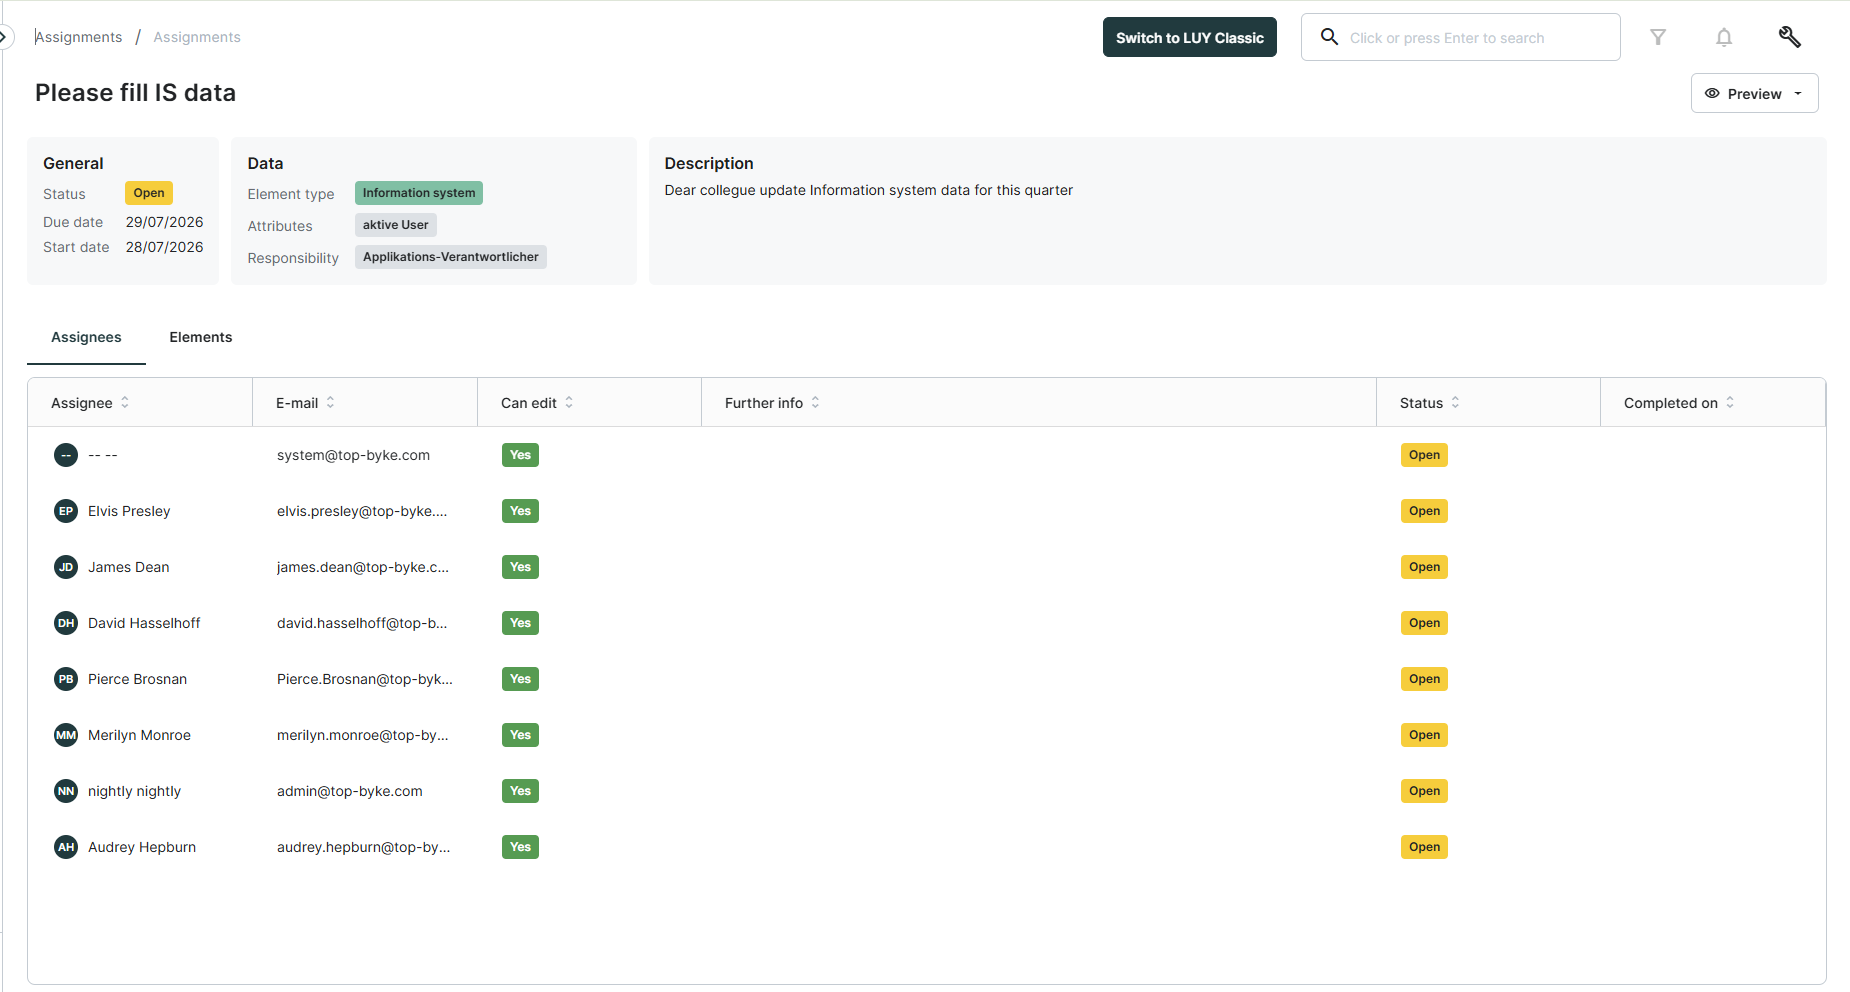
Clicking a Draft assignment opens the assignment creation workflow, allowing you to continue editing the draft before publishing.
Copying assignments
To reuse an existing assignment, select the assignment in the Created by me tab and click Copy. A new draft is created containing the assignment configuration, due date, configured questions, assignees, and reminder settings. Review the copied assignment, make any required changes, and click Publish when you are ready.
Deleting assignments
Assignments can be deleted from the Created by me tab. Select one or more assignments using the checkboxes, then click Delete in the toolbar. A confirmation dialog is displayed before the selected assignments are permanently deleted.
Deleted assignments cannot be restored.
Assignment status
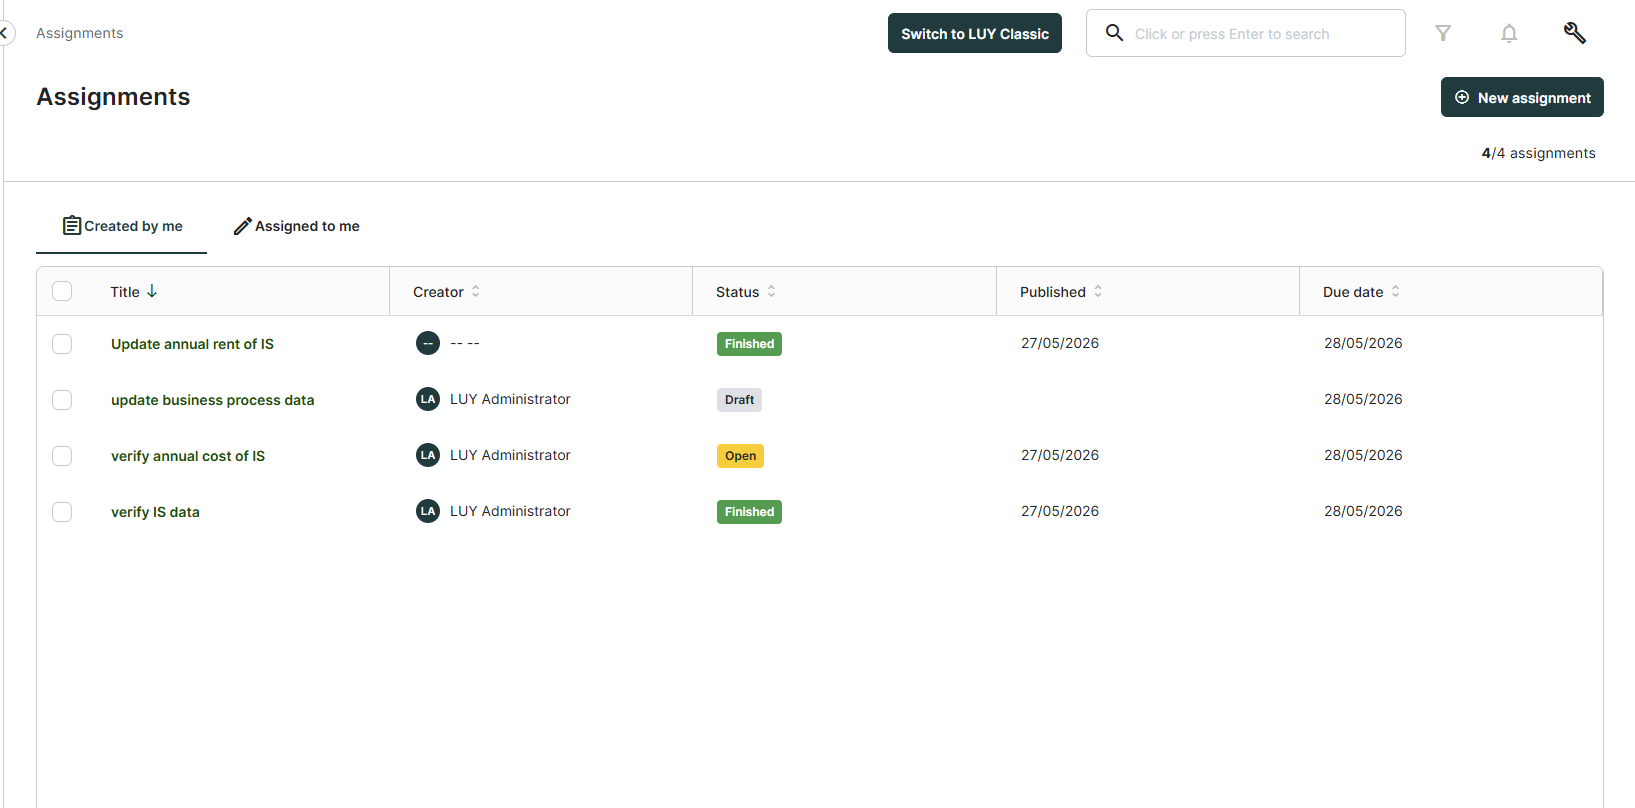
|
Status |
Meaning |
|---|---|
|
Draft |
The assignment is being configured and has not been published yet. |
|
Open |
The assignment has been published and is in progress. |
|
Finished |
All assignees have completed their updates. |
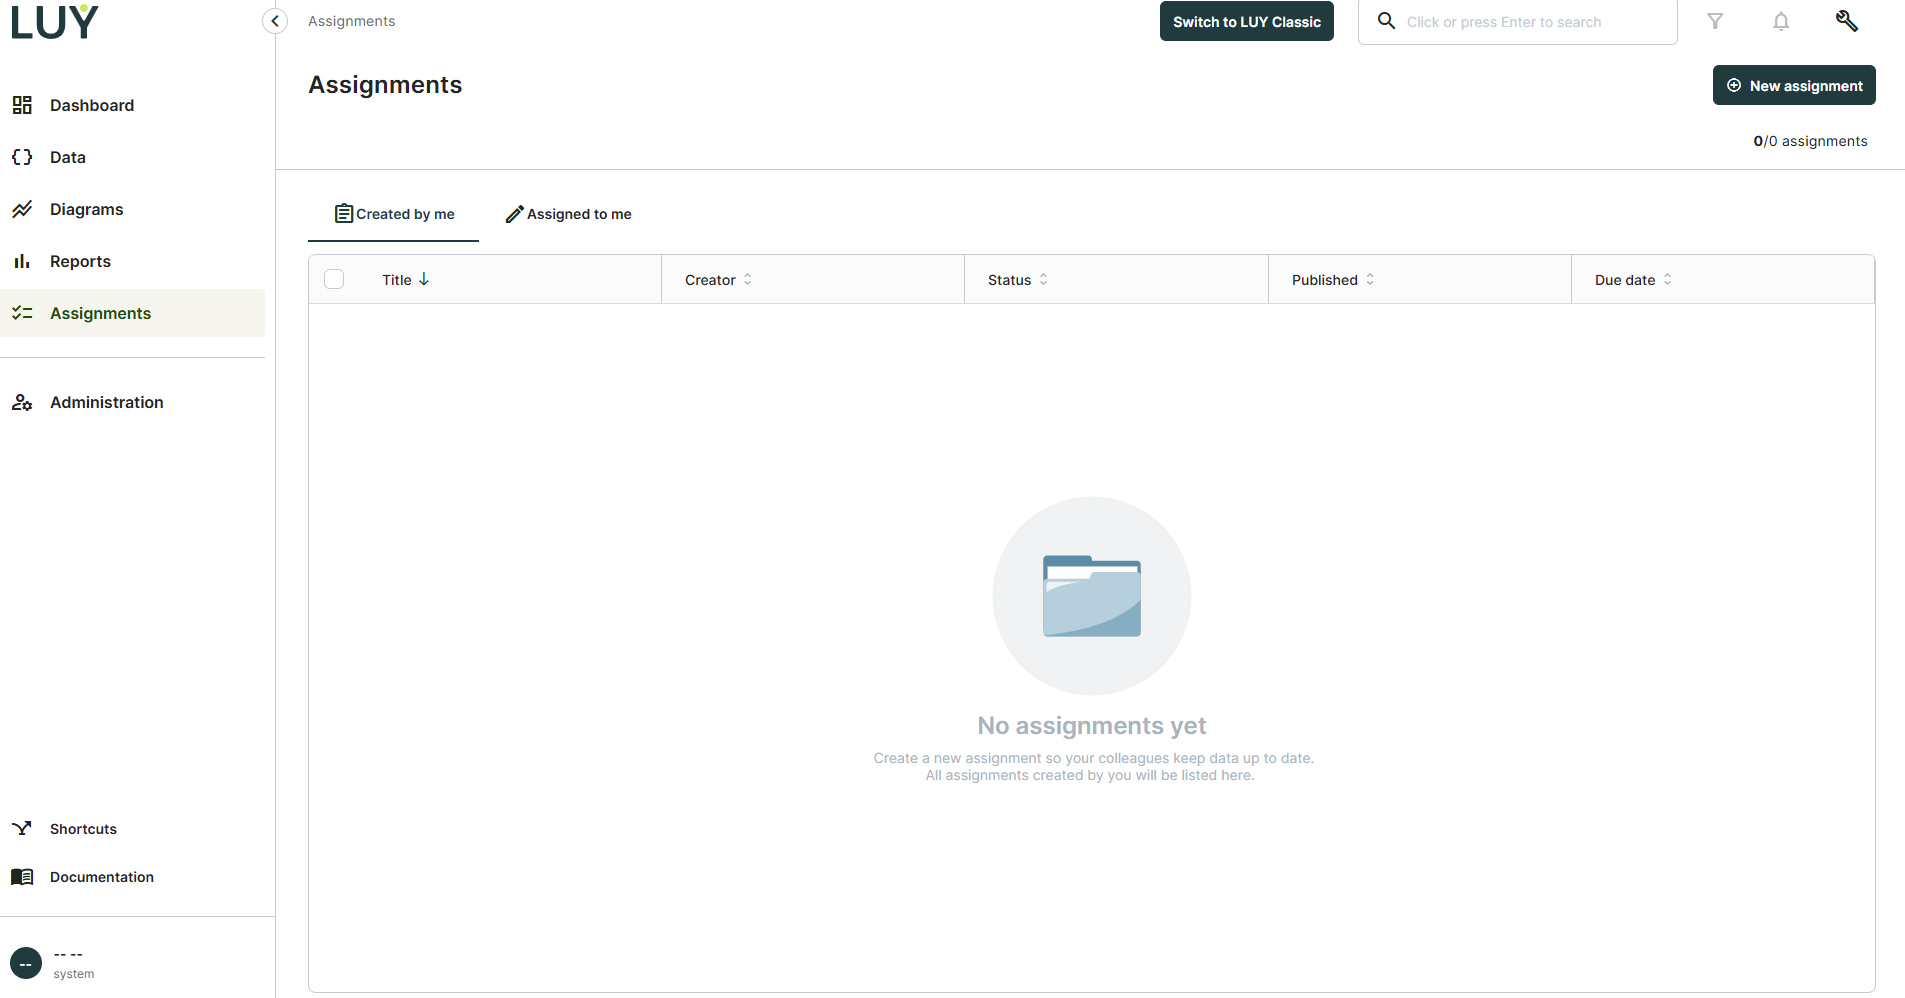
The Assignments overview has two tabs:
-
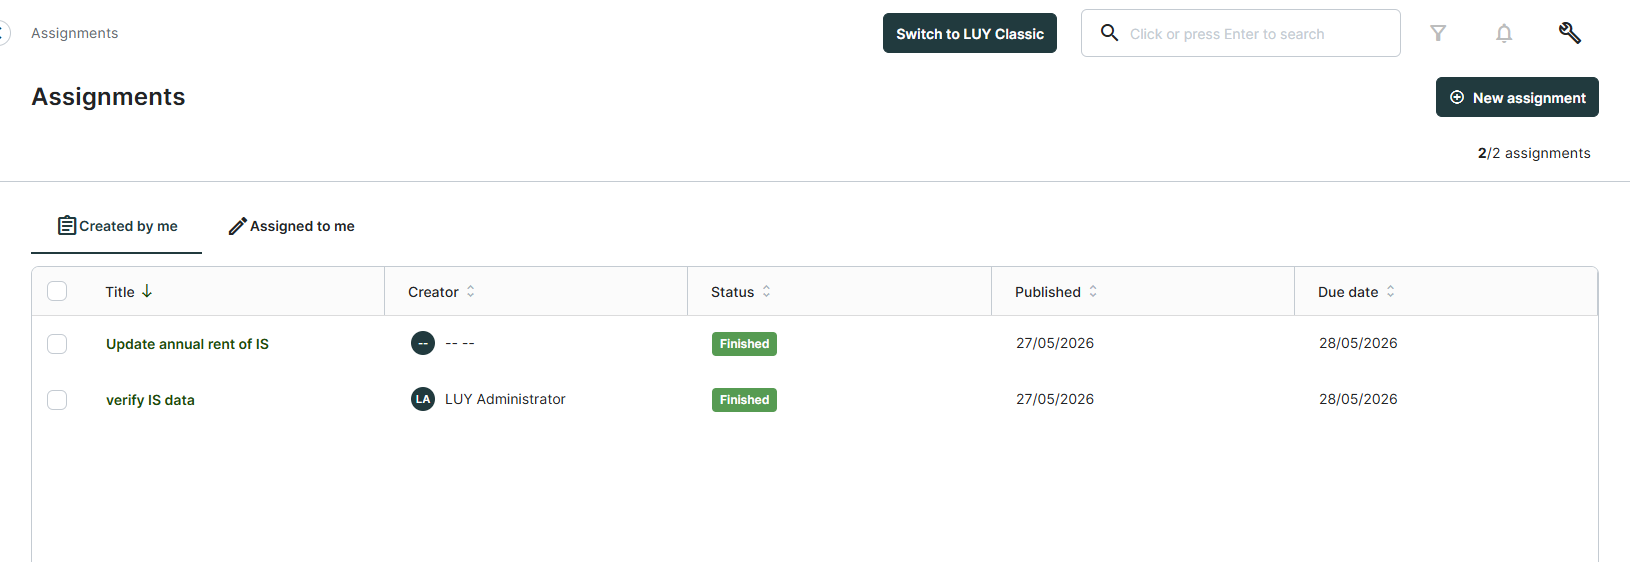
Created by me: Lists all assignments you created, with columns for title, status, published date, and due date.
-
Assigned to me: Lists all open assignments assigned to you, with columns for title, creator, status, published date, and due date.
Administrators (users with the role LUY_Supervisor) can view all assignments across all creators. For administrators, the overview table includes an additional Creator column.